After the Chapter Leader Update has been created and mailed out to people, you must duplicate it on the website, which requires different formatting and processing.
This is part 3 of 3 in a series: Also see tutorials on Creating the Chapter Leader Update and Create the Chapter Leader Update in Marketing Cloud.
1) Create a new Chapter Leader Update in the CMS
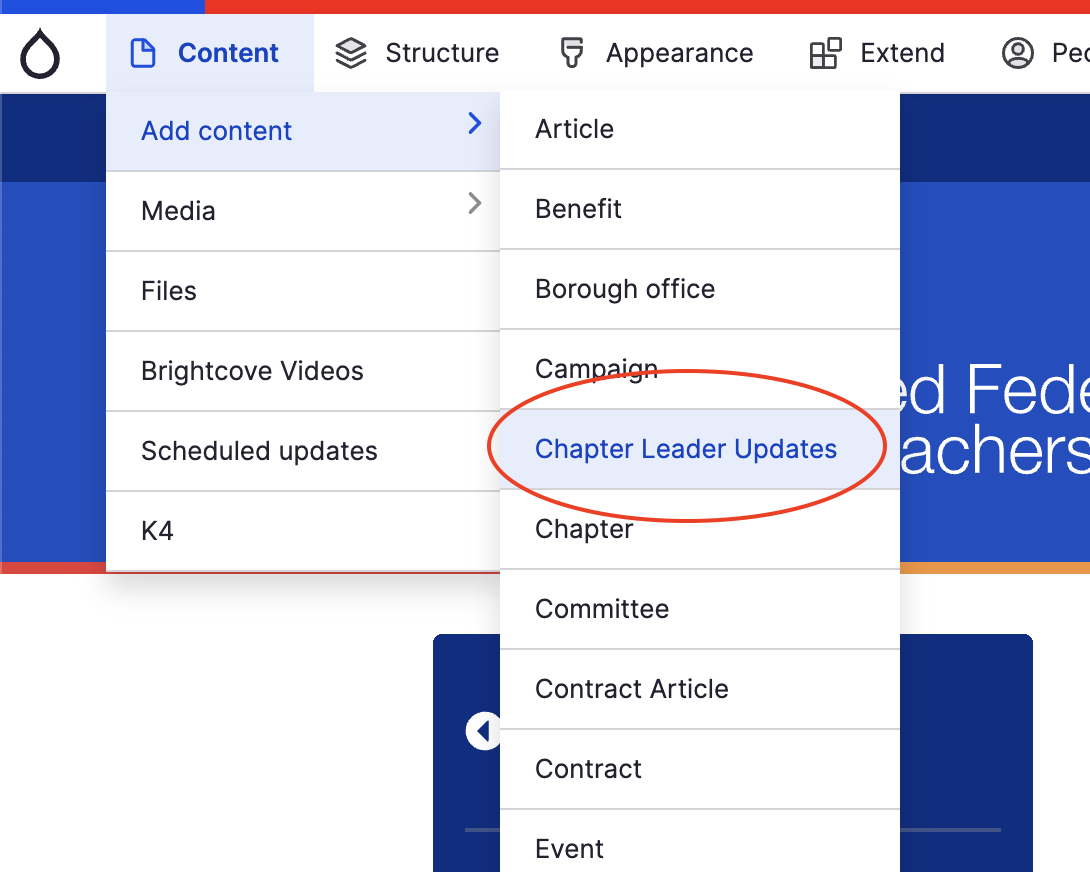
Log into the website as an Admin or Publisher and select “Content > Add content > Chapter Leader Updates“. This will create a new CLU content type.
2) Name the CLU
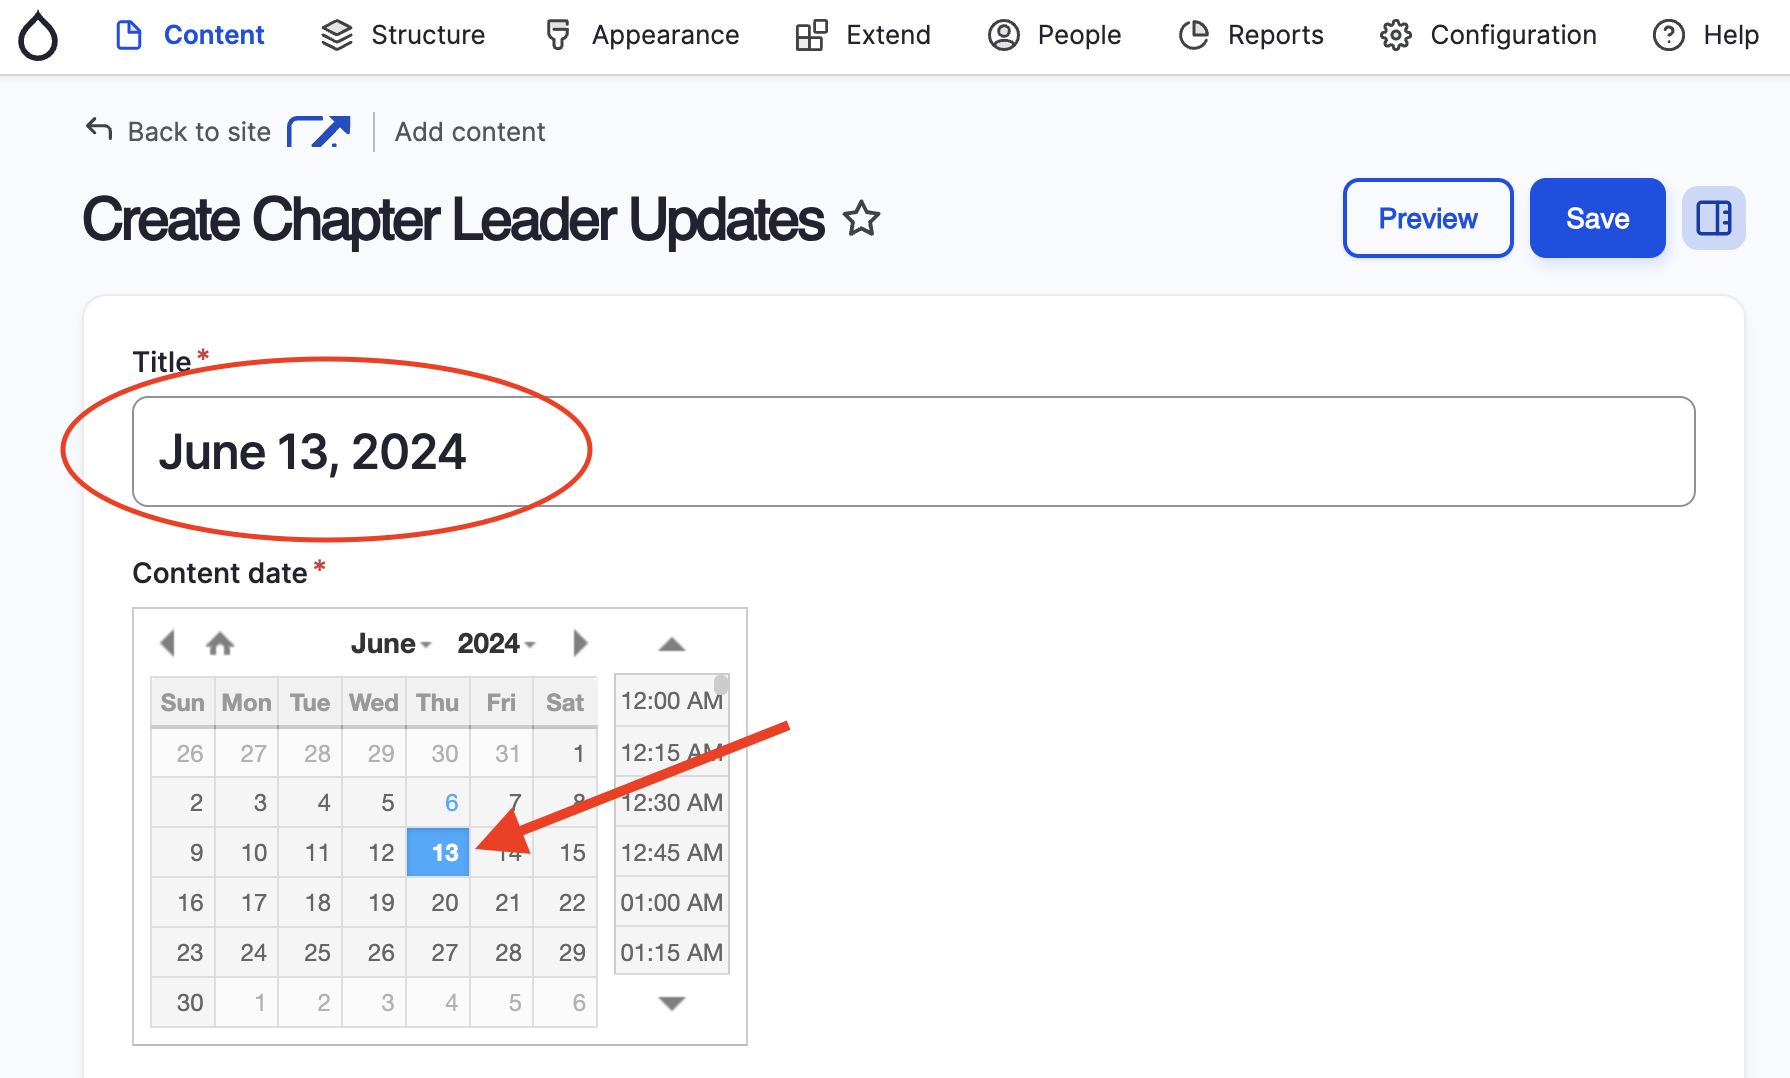
Standard naming convention for the web version is to use the date the email was sent to Chapter Leaders.
Make sure you change it to match that date in the “Content Date” calendar as well.
3) Add the snapshot
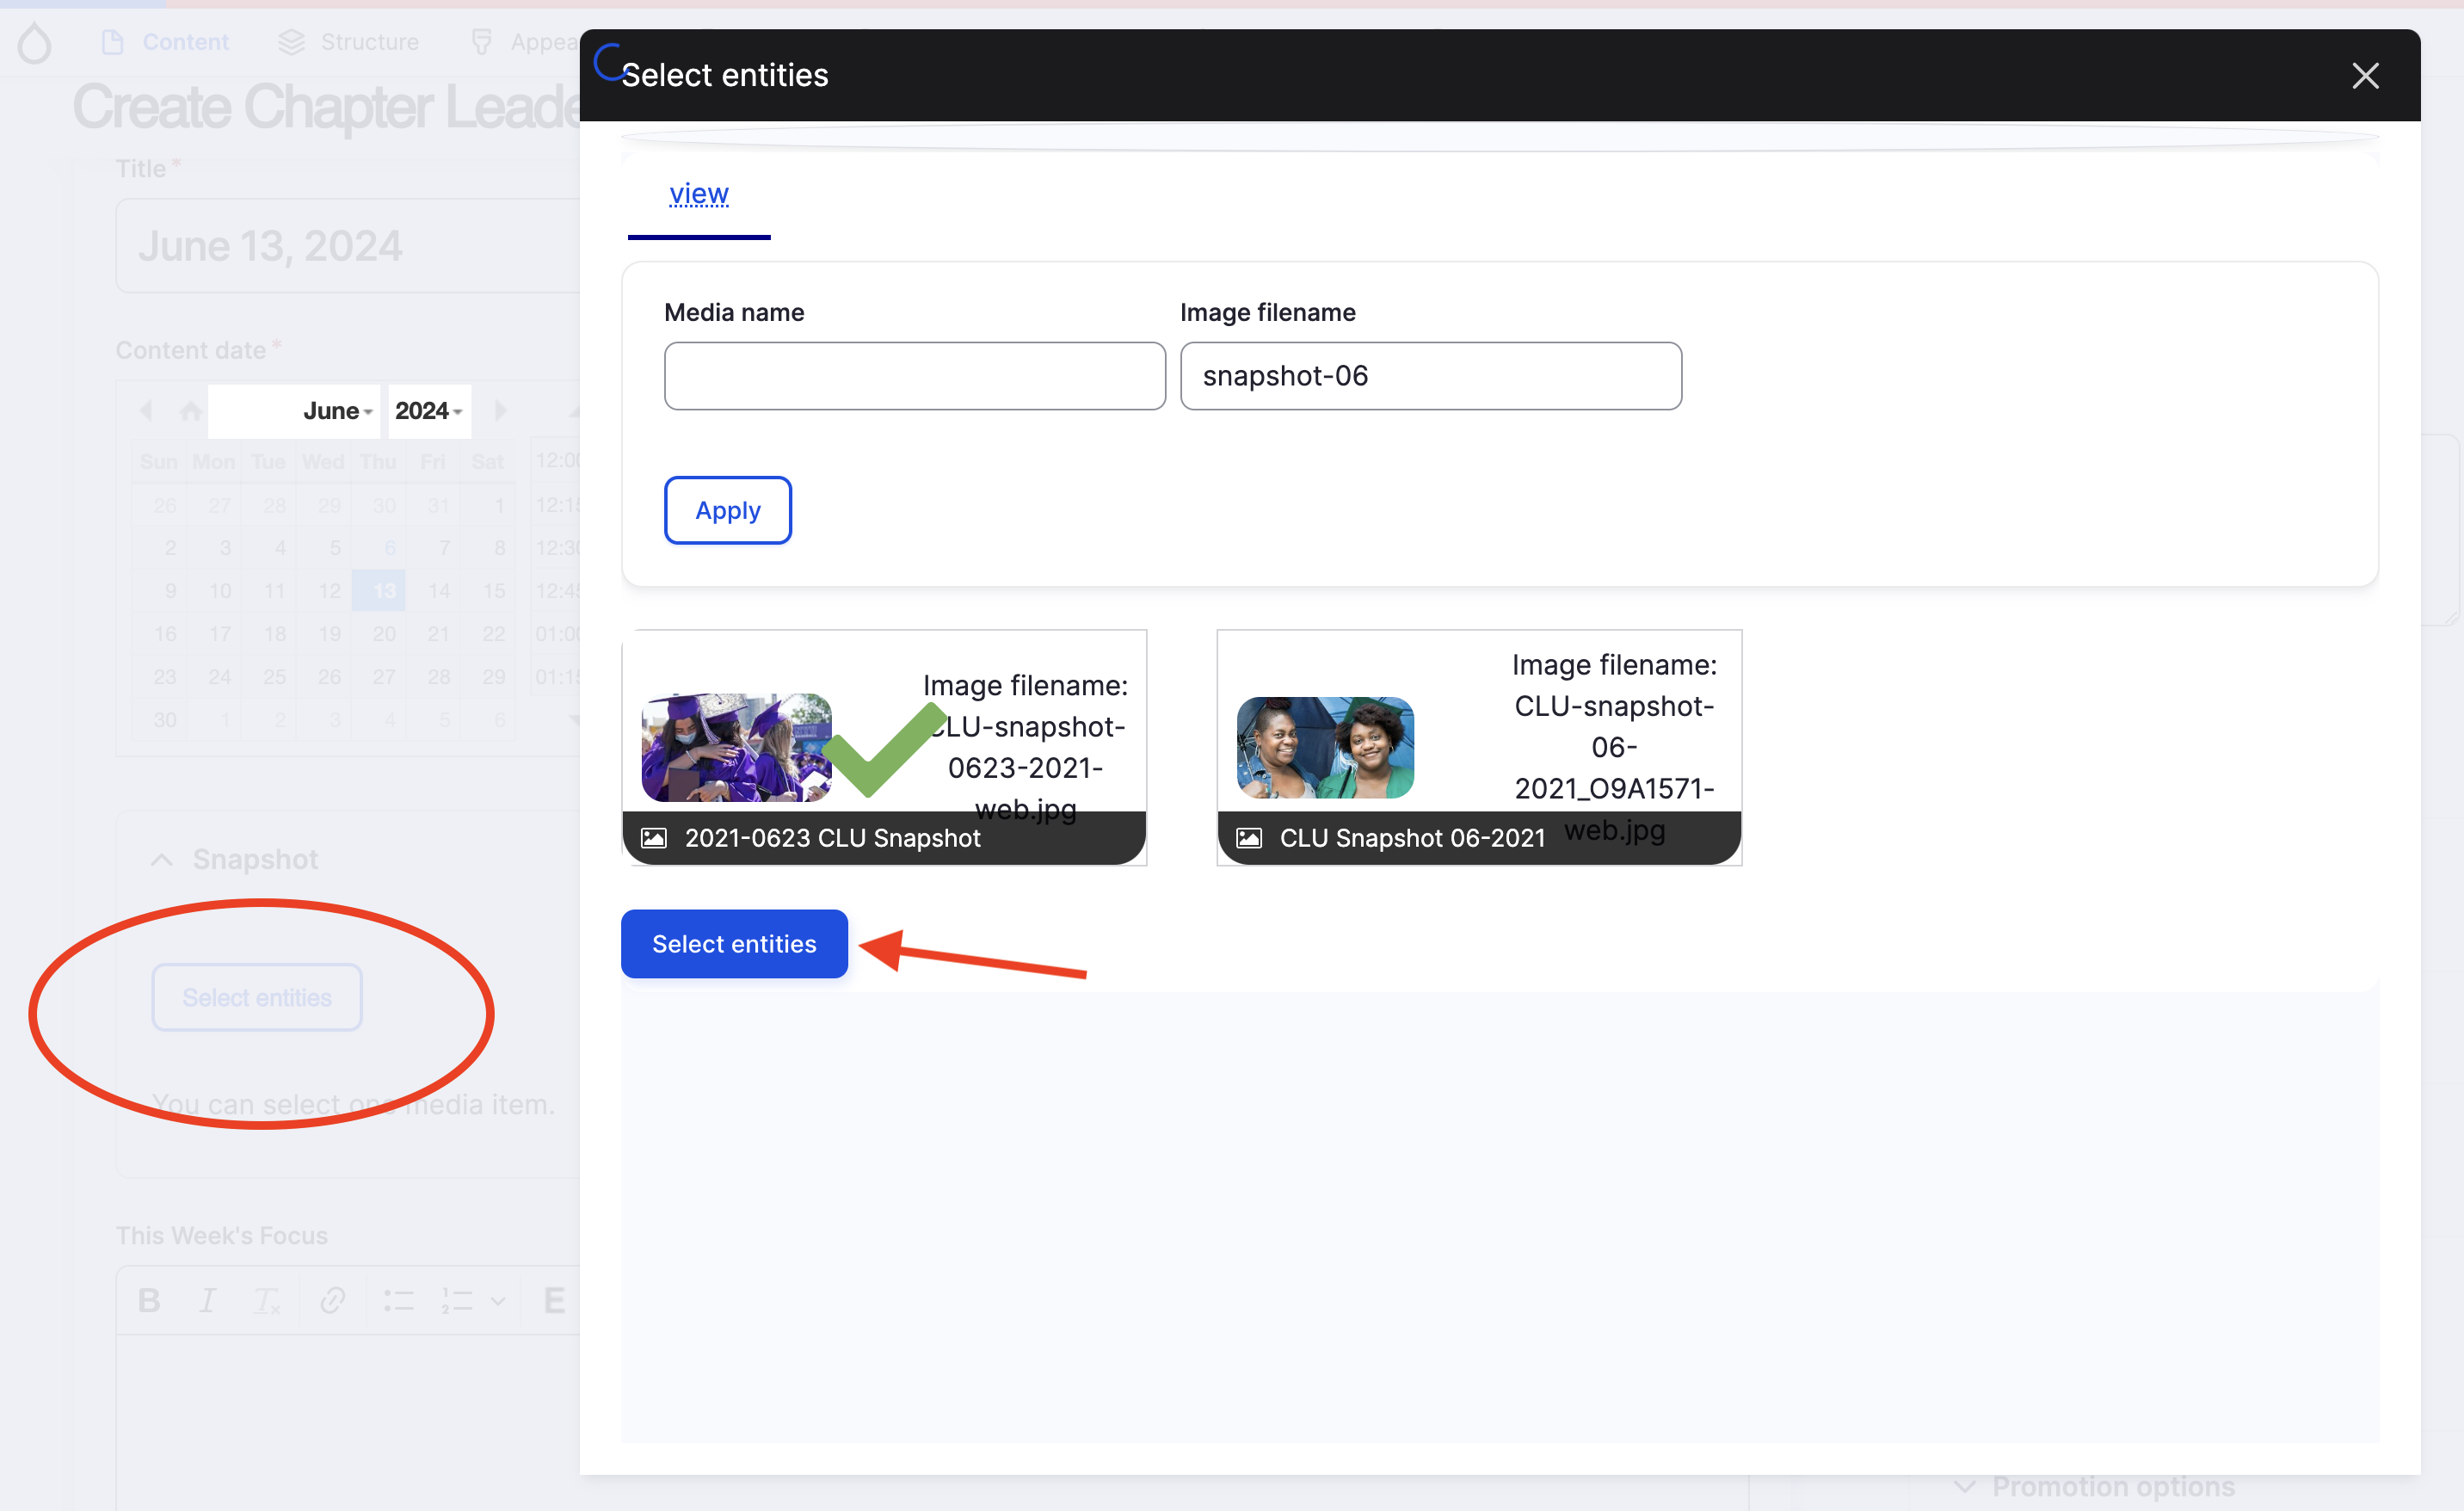
The snapshot should be identical to whatever image was included in the email, but it should be much higher resolution to accommodate the desktop.
For this reason, I always optimize two different versions:
- One low-resolution one that’s a maximum 1200px wide at 72dpi for Marketing Cloud
- One larger one that can be as wide as 3800px that we use on the website (this is a relatively new standard meant to accommodate high resolution 4K monitors).
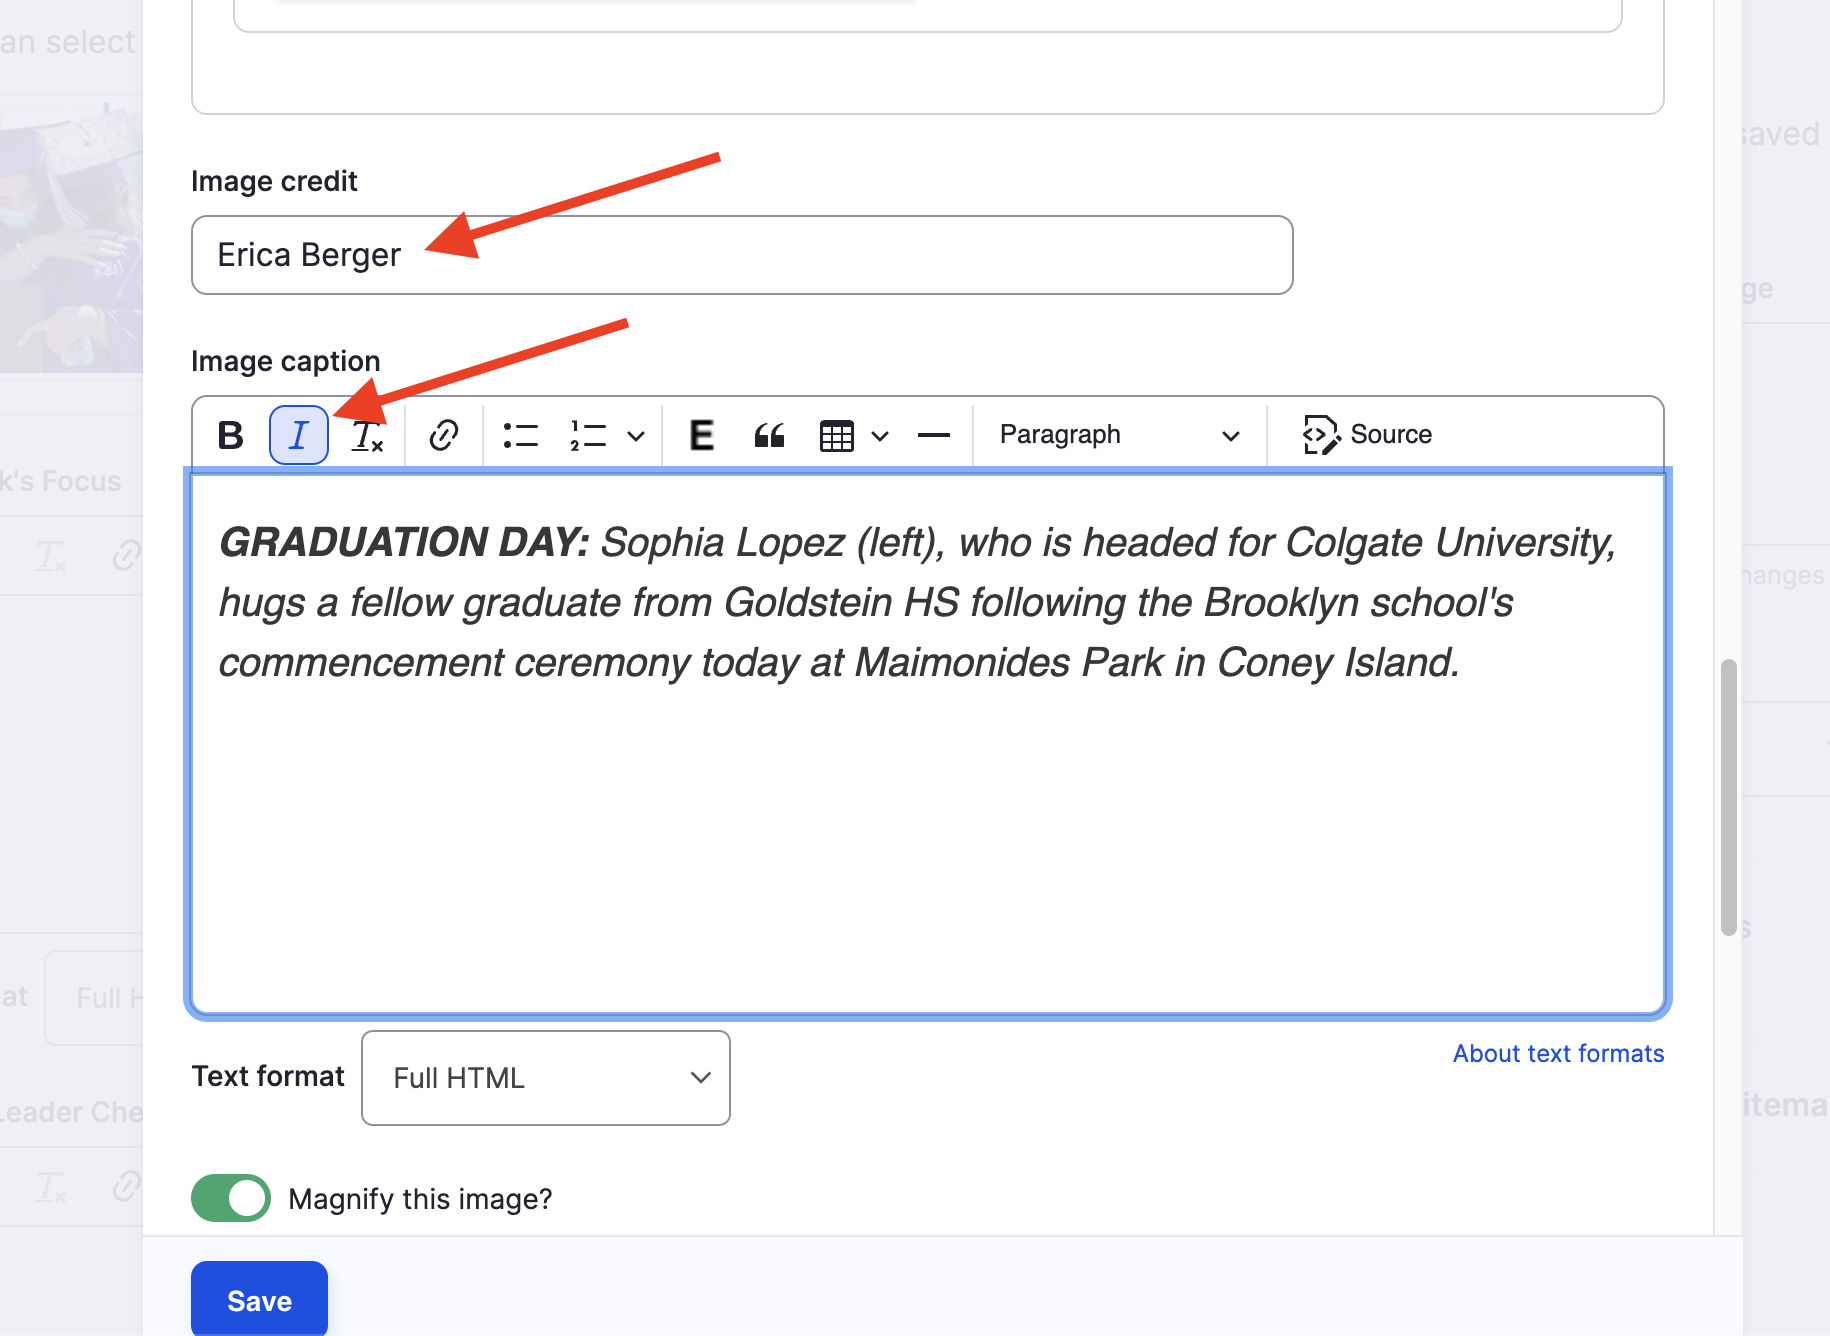
The Snapshot should be uploaded the same way as any other image we add to the website. The caption should match exactly what was written in the email (including BOLDING and making the teaser ALL CAPS and italicising the entire thing).
The only difference is there is a separate field for the credit where you should add the photographer’s name (with no parentheses).
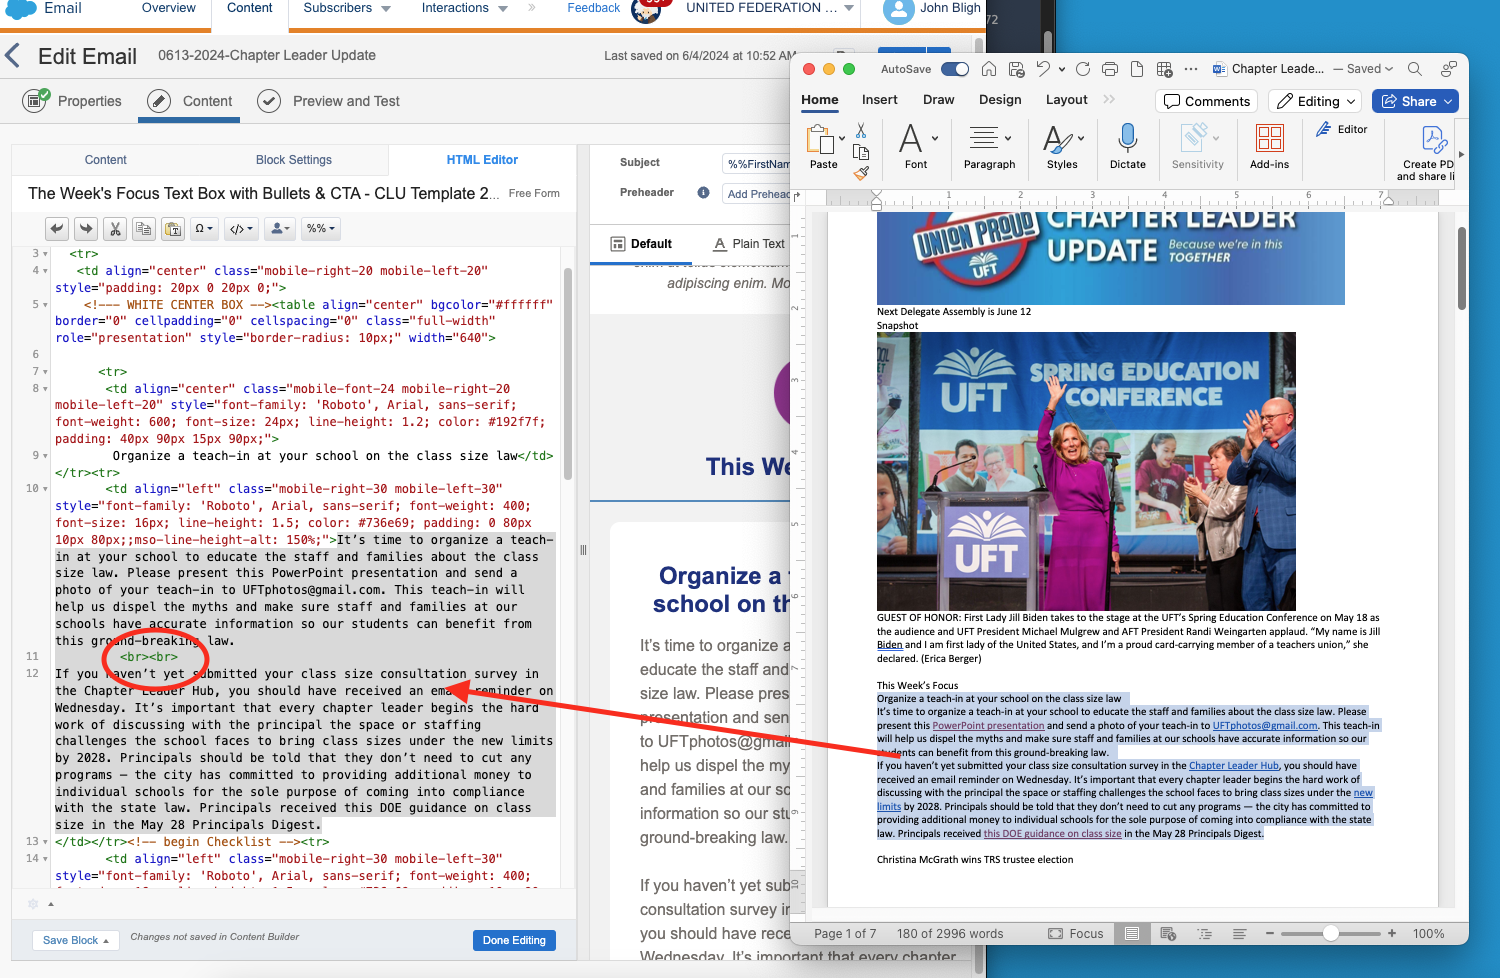
4) Add content
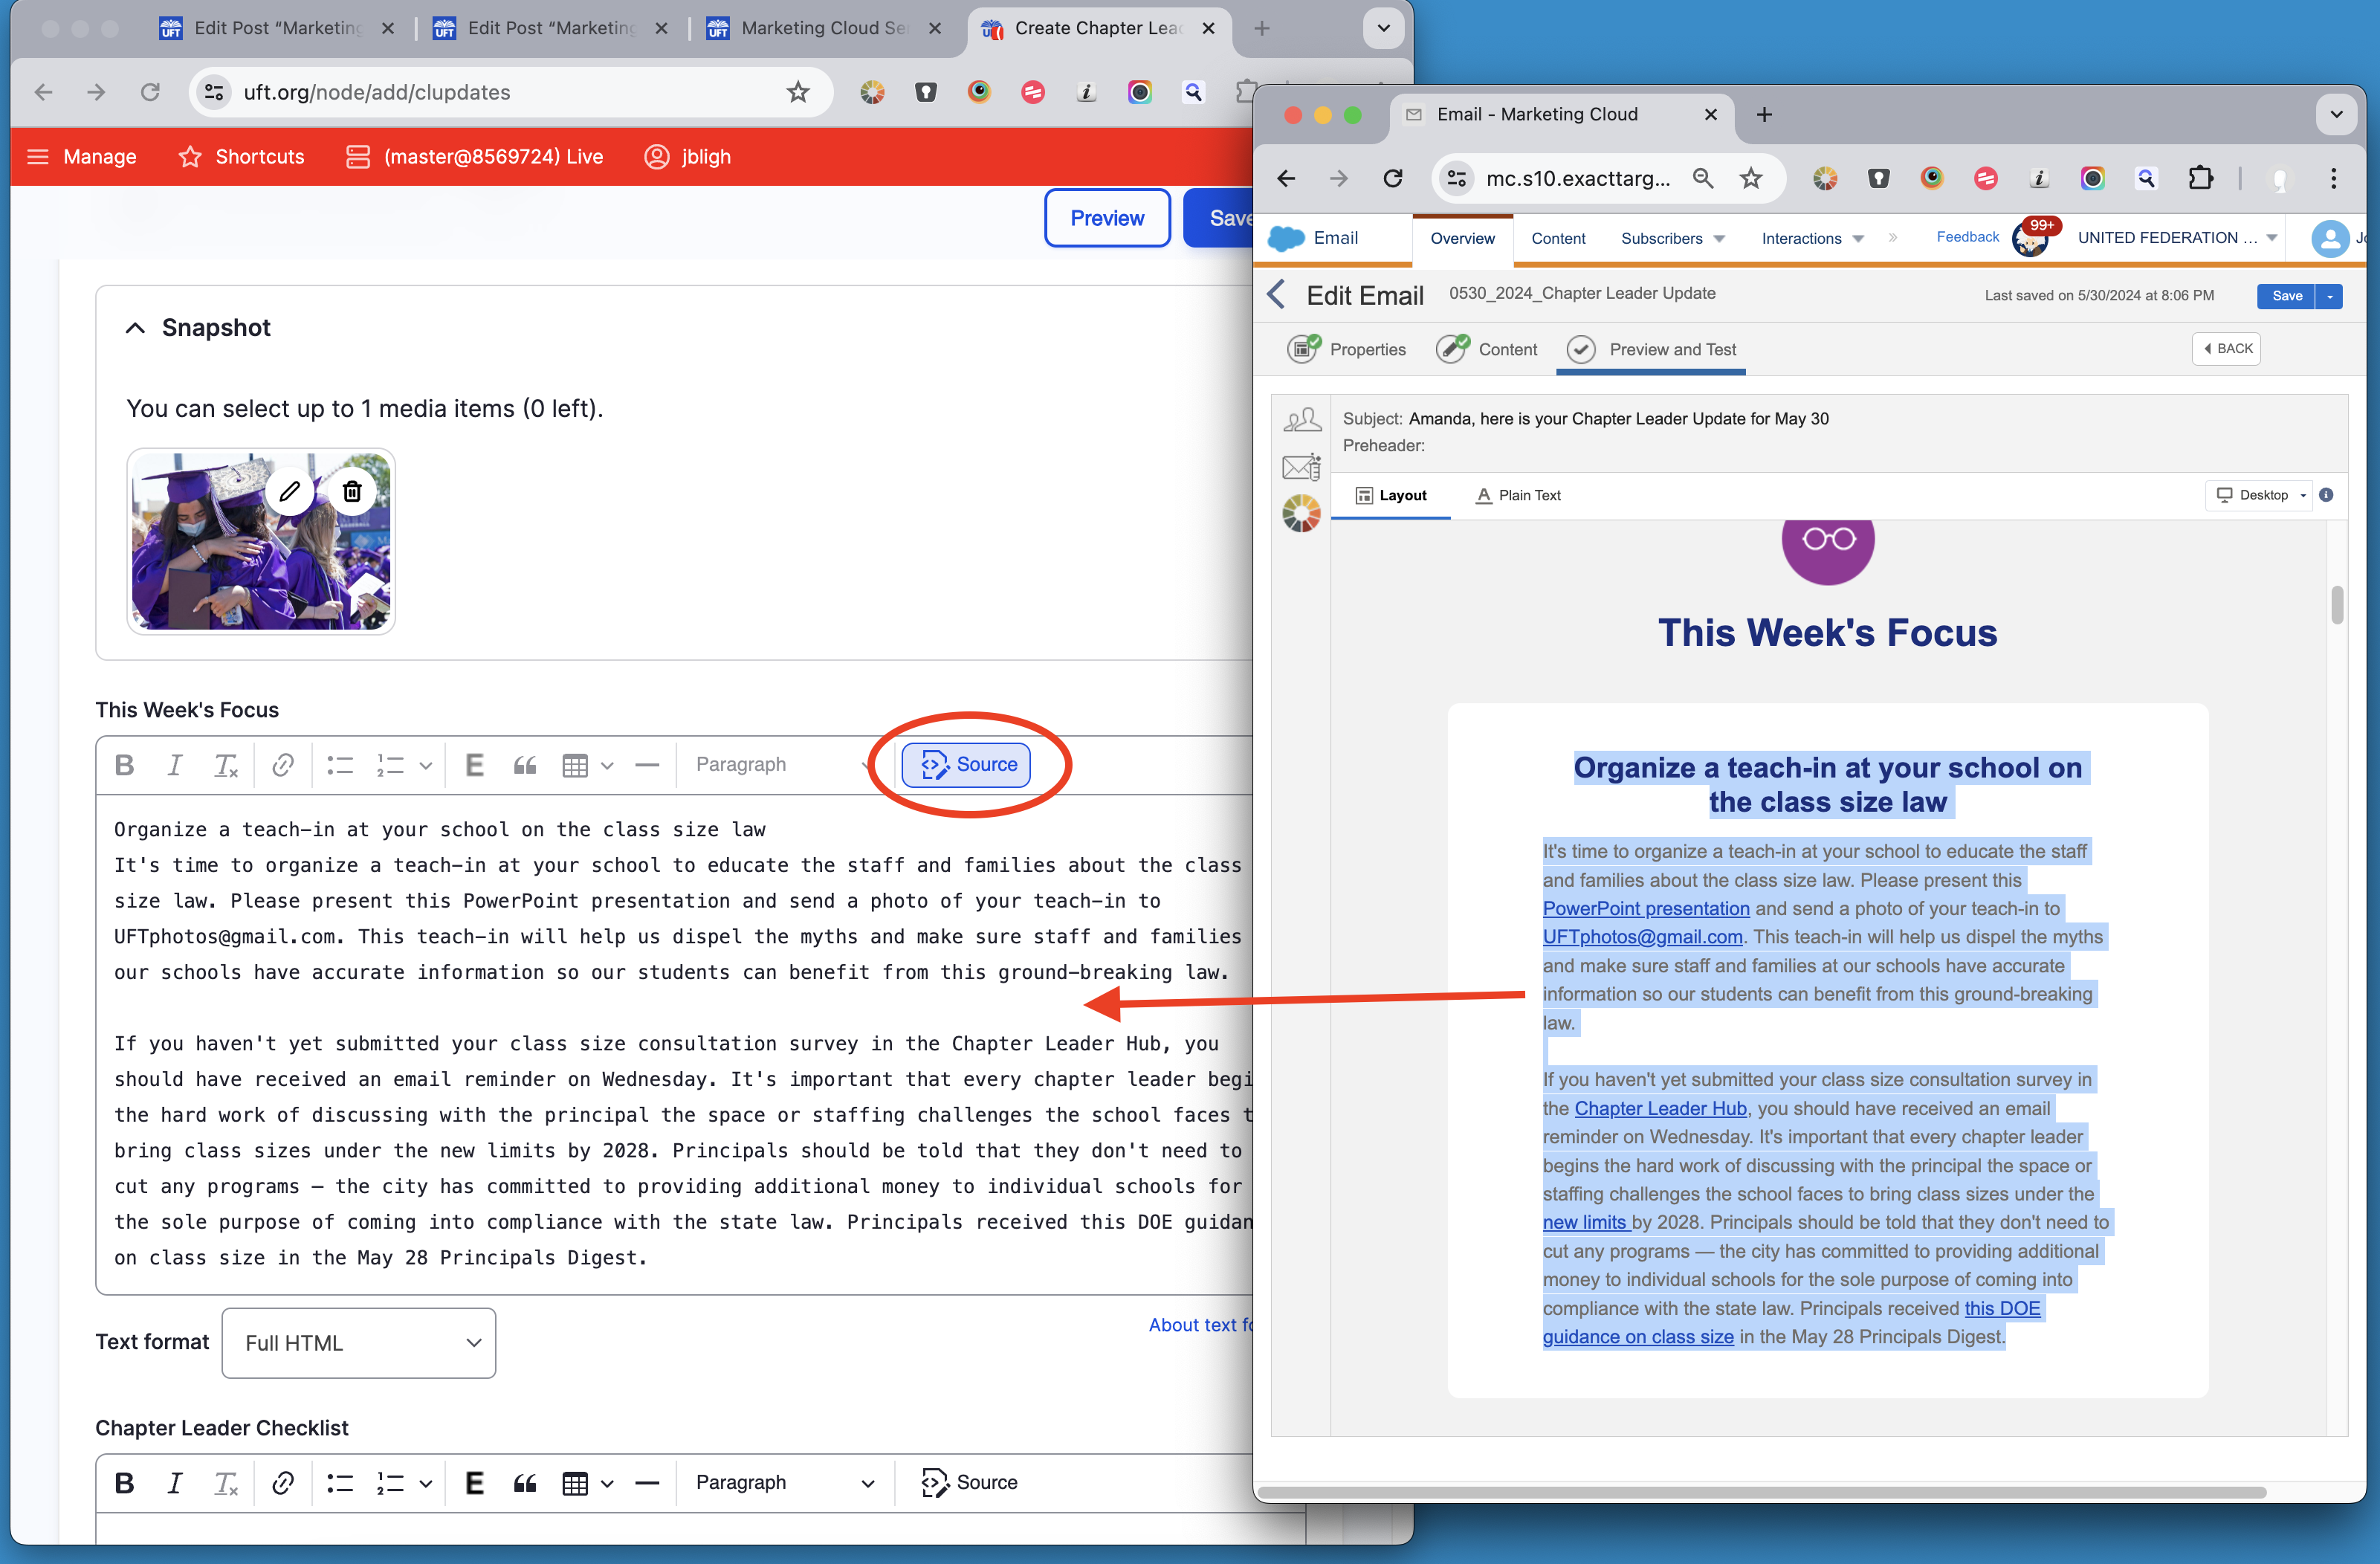
To add content, I recommend you use the final version of the CLU email as it will have all the final edits and changes. the cleanest way to do this is to copy the text from the email and paste it in in the source view.
Unfortunately, this will not add the links so you’ll have to do that manually in the editor view.
If you paste the content directly into the editor view, it will also carry over all the formatting and Marketing Cloud-specific back-end code. This could easily break your webpage.
You can edit all that out in the source view, but it’s easy to miss things and takes longer than simply pasting it in clean and adding the links after.
Once you’ve pasted the content in the source view, click the “Source” button again to return to standard editing view.
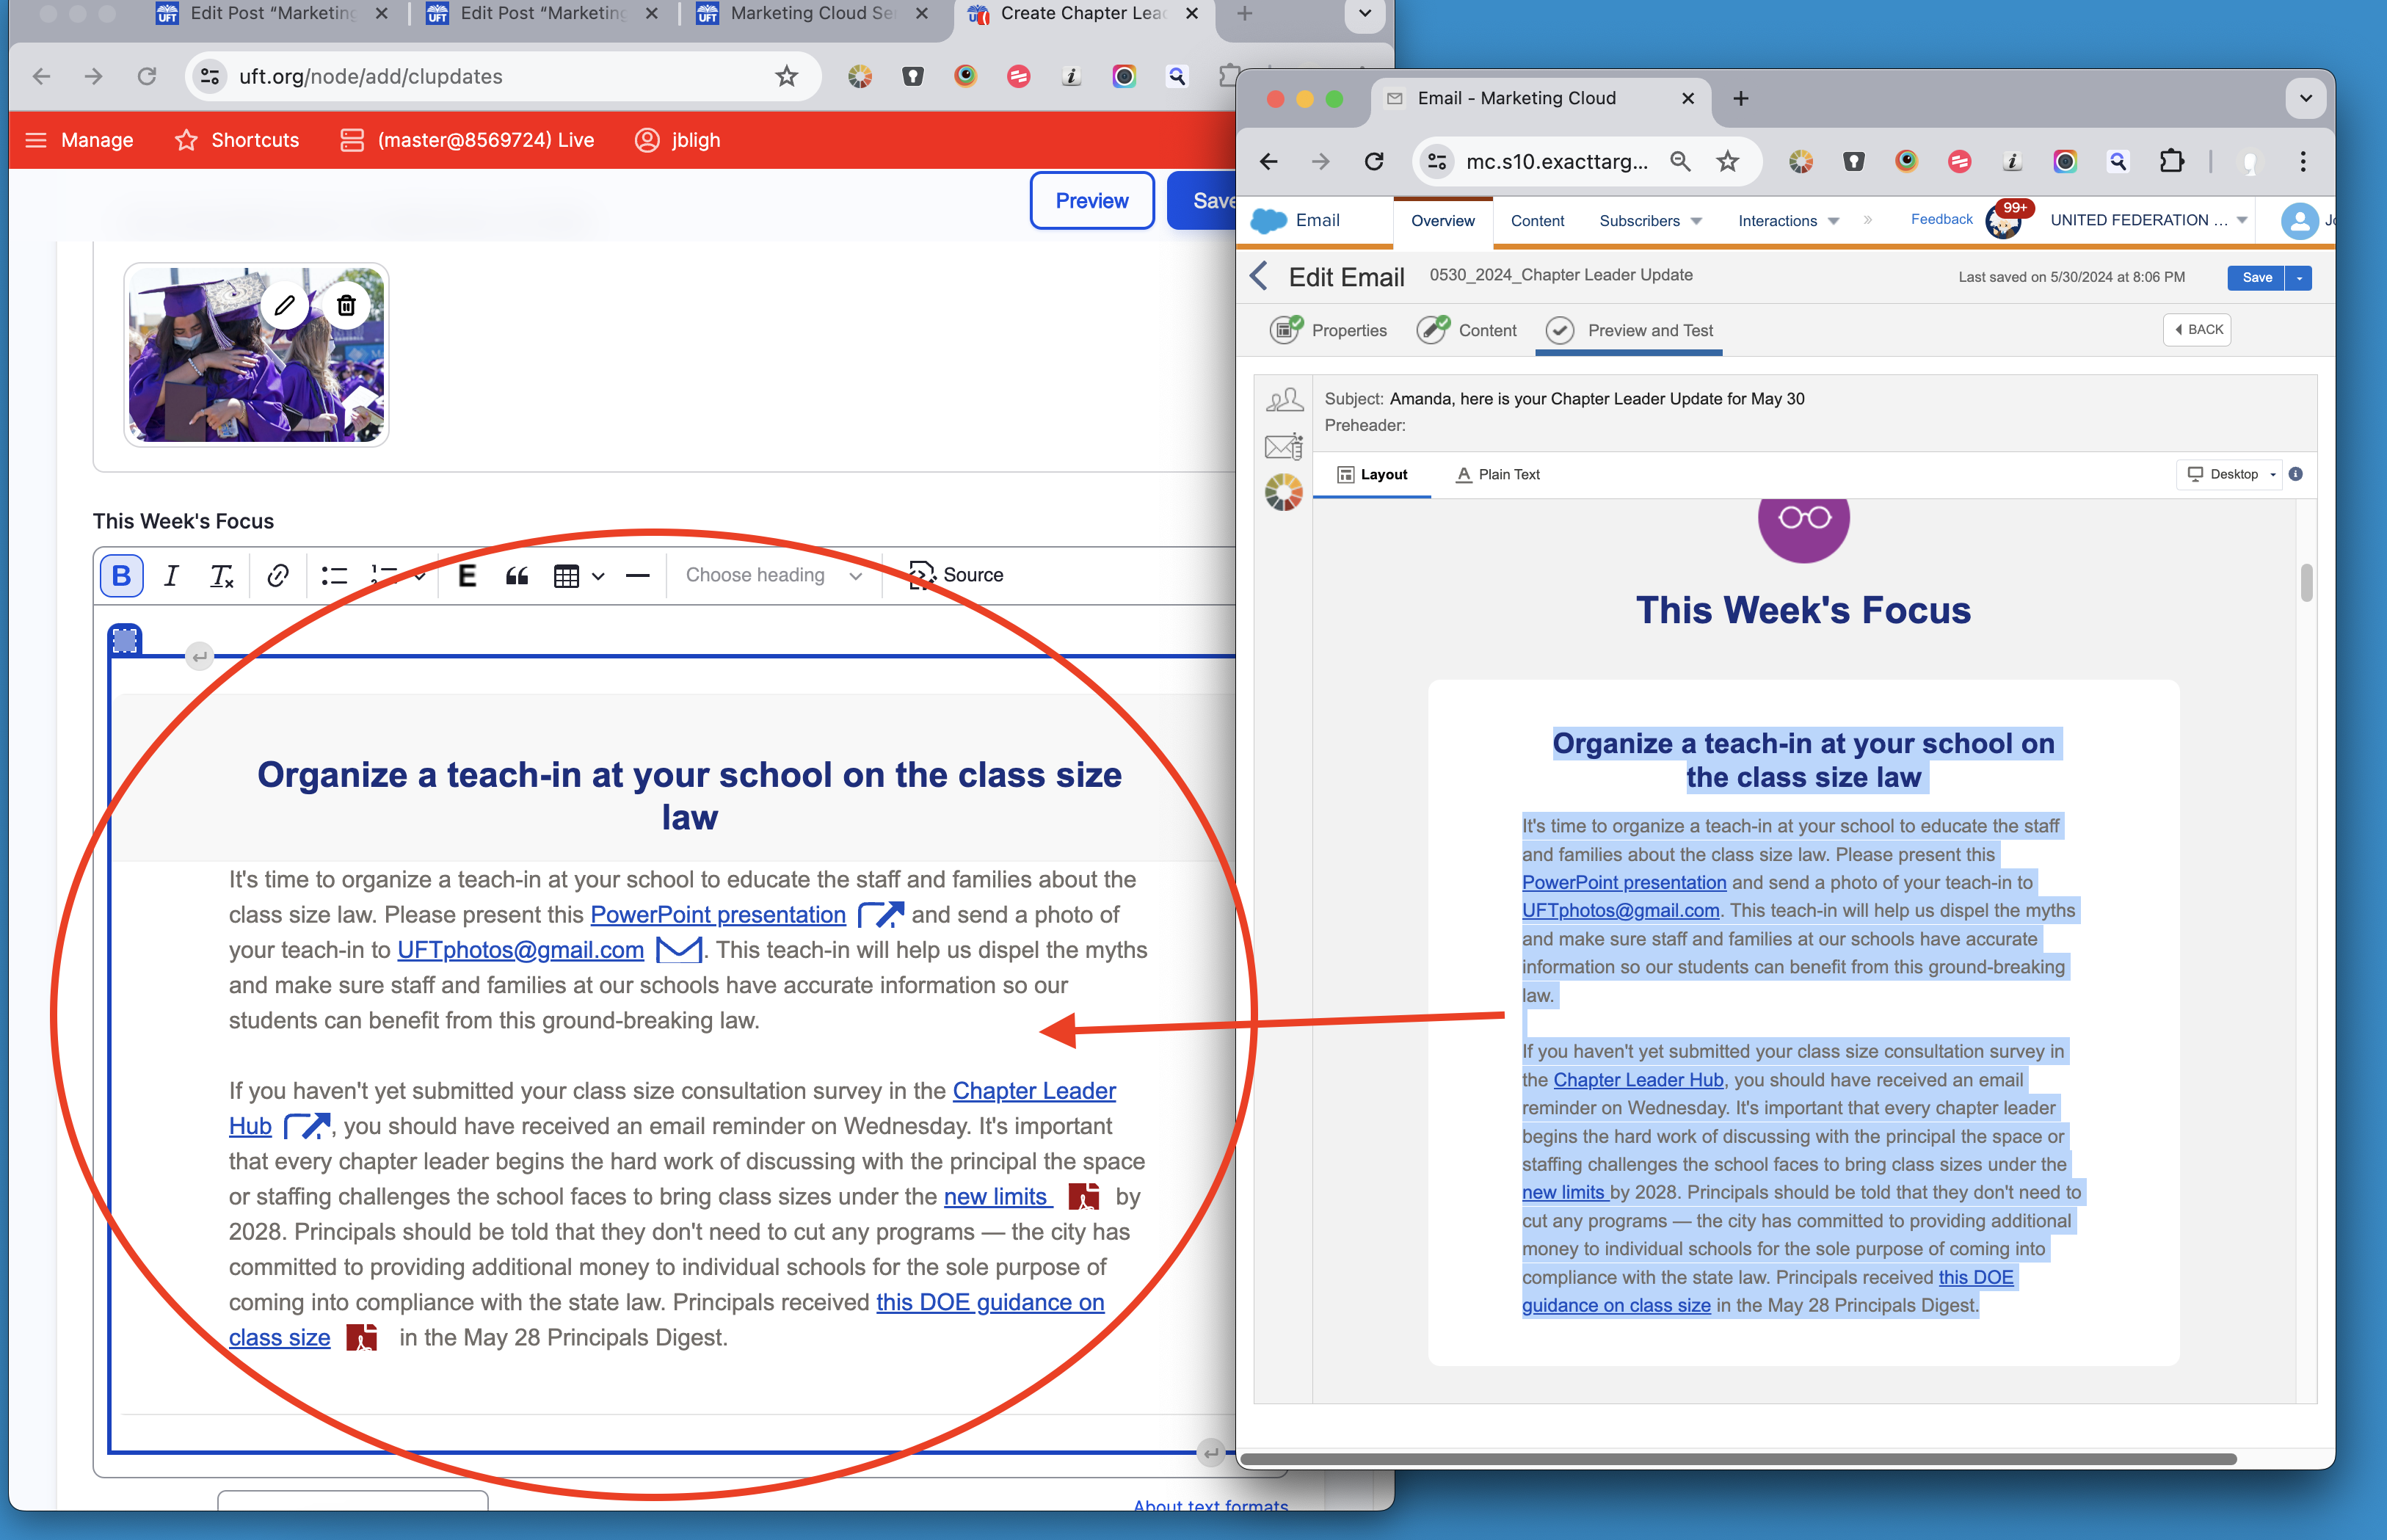
There, you can format it using the built in formatting tools in the editor.
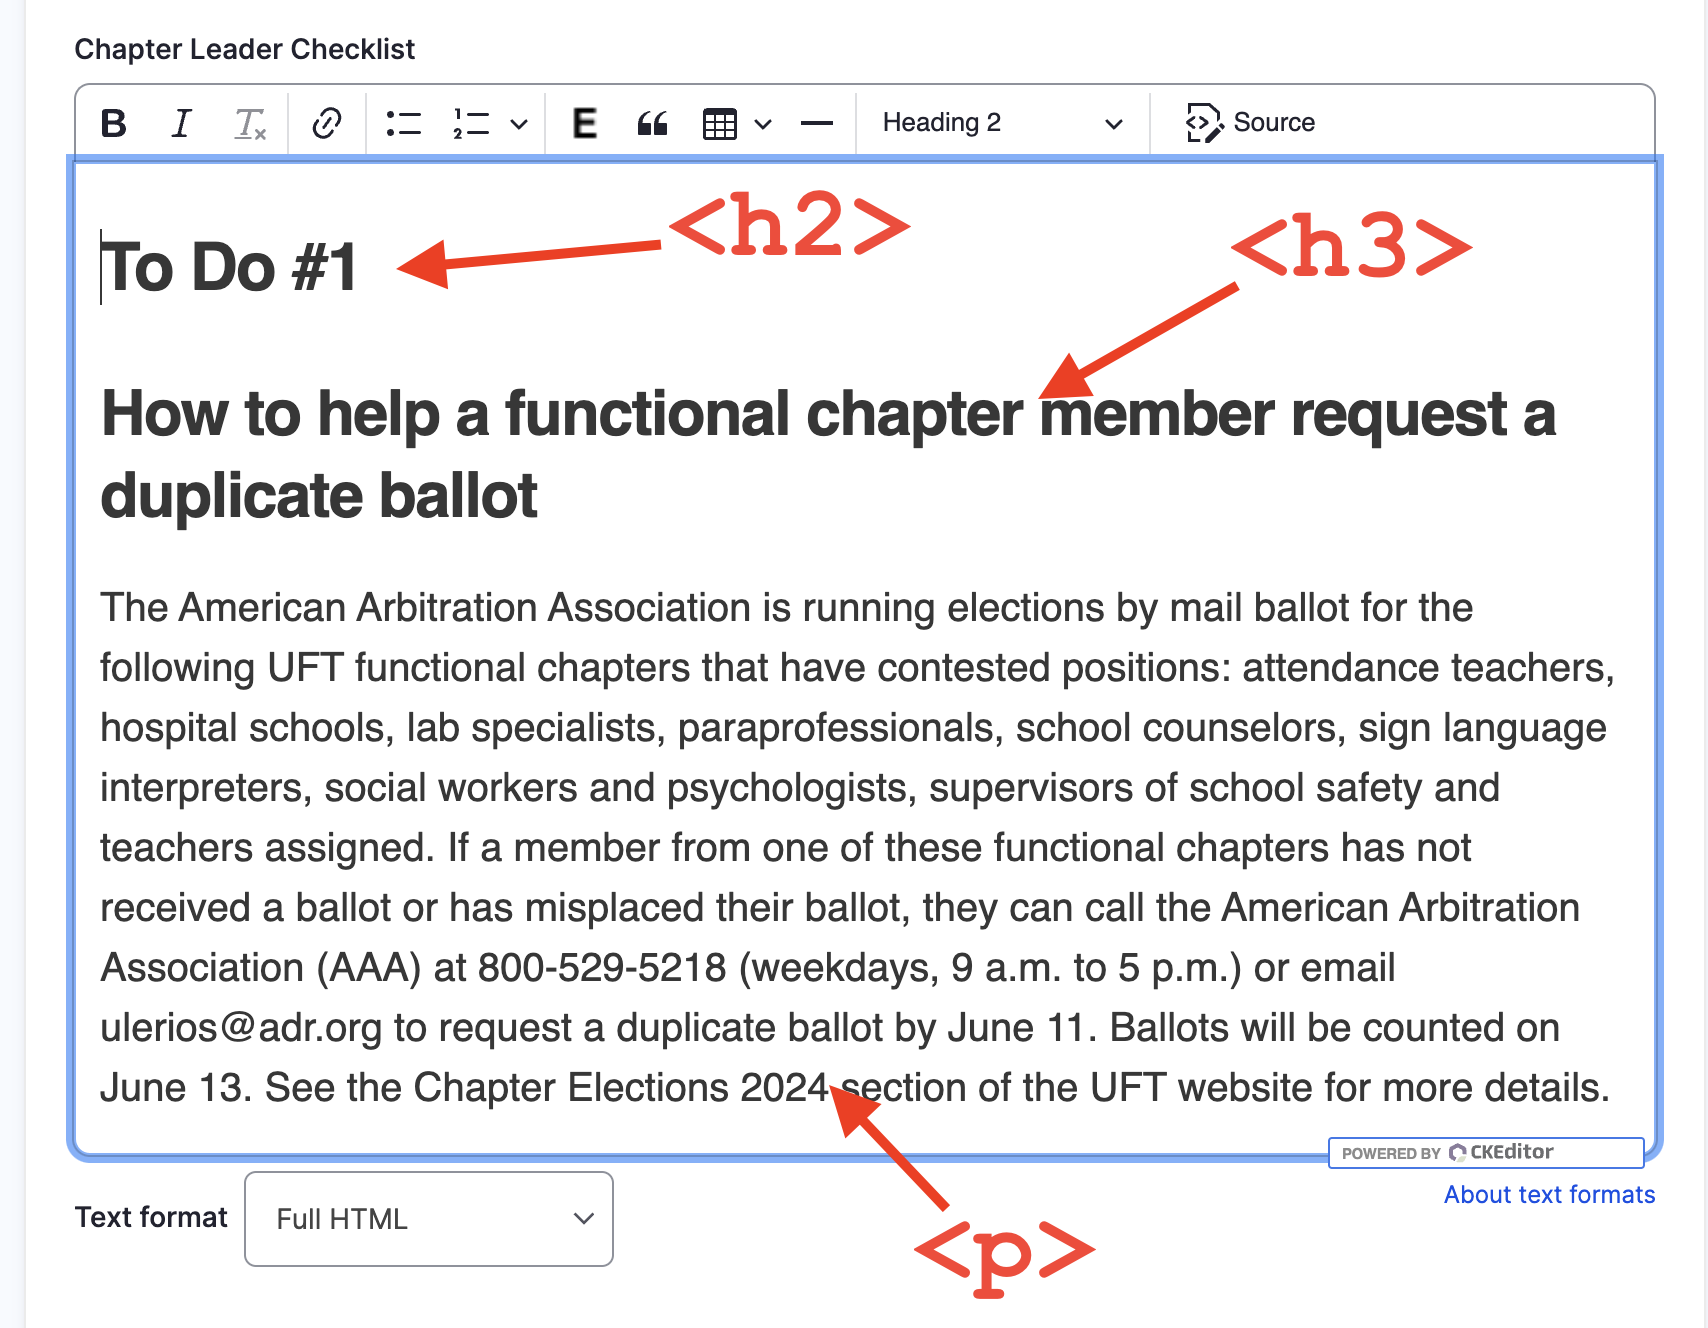
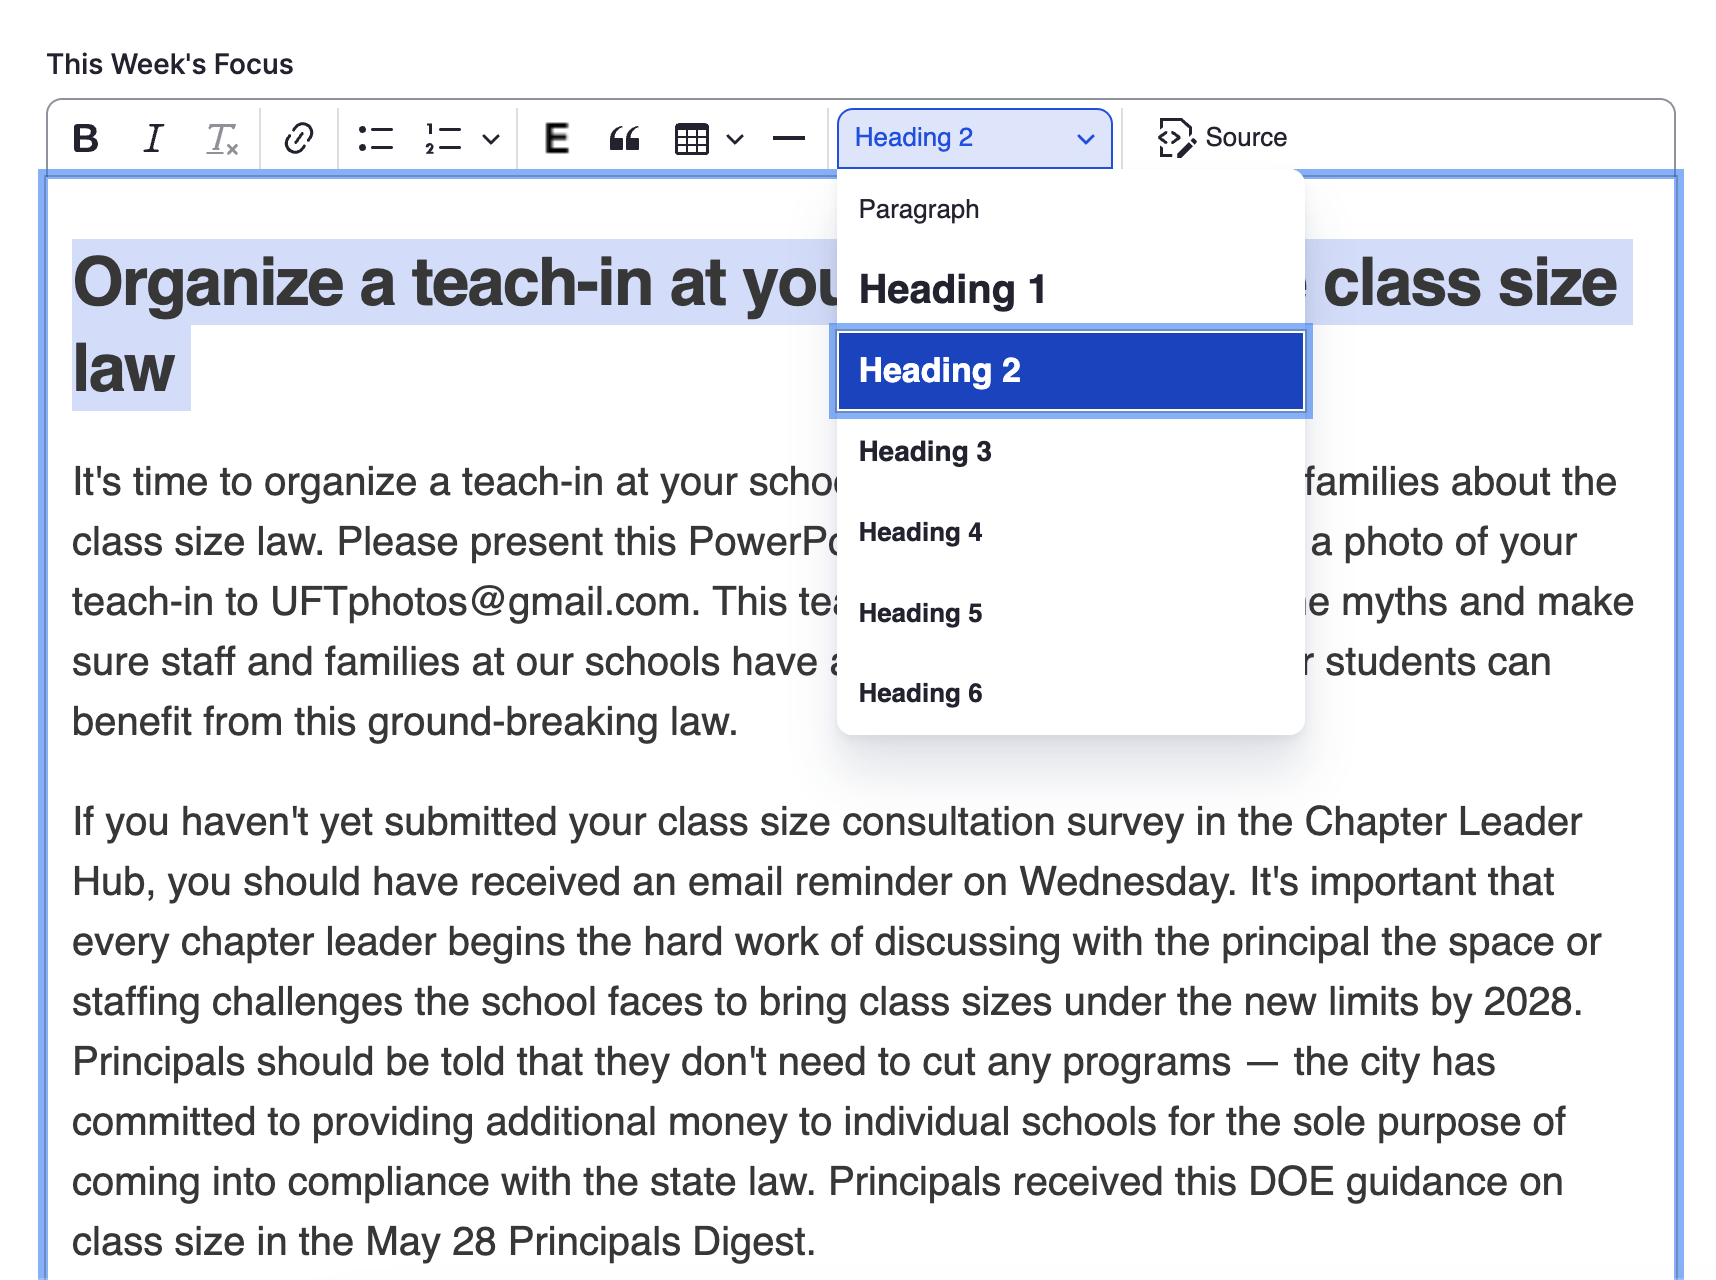
In almost every section, the CLU uses regular semantic HTML standards: Headlines should be H2, sub-headlines should be H3, etc.. The built-in editor will help you format it correctly or you can refer to older CLUs to see how it’s formatted there.
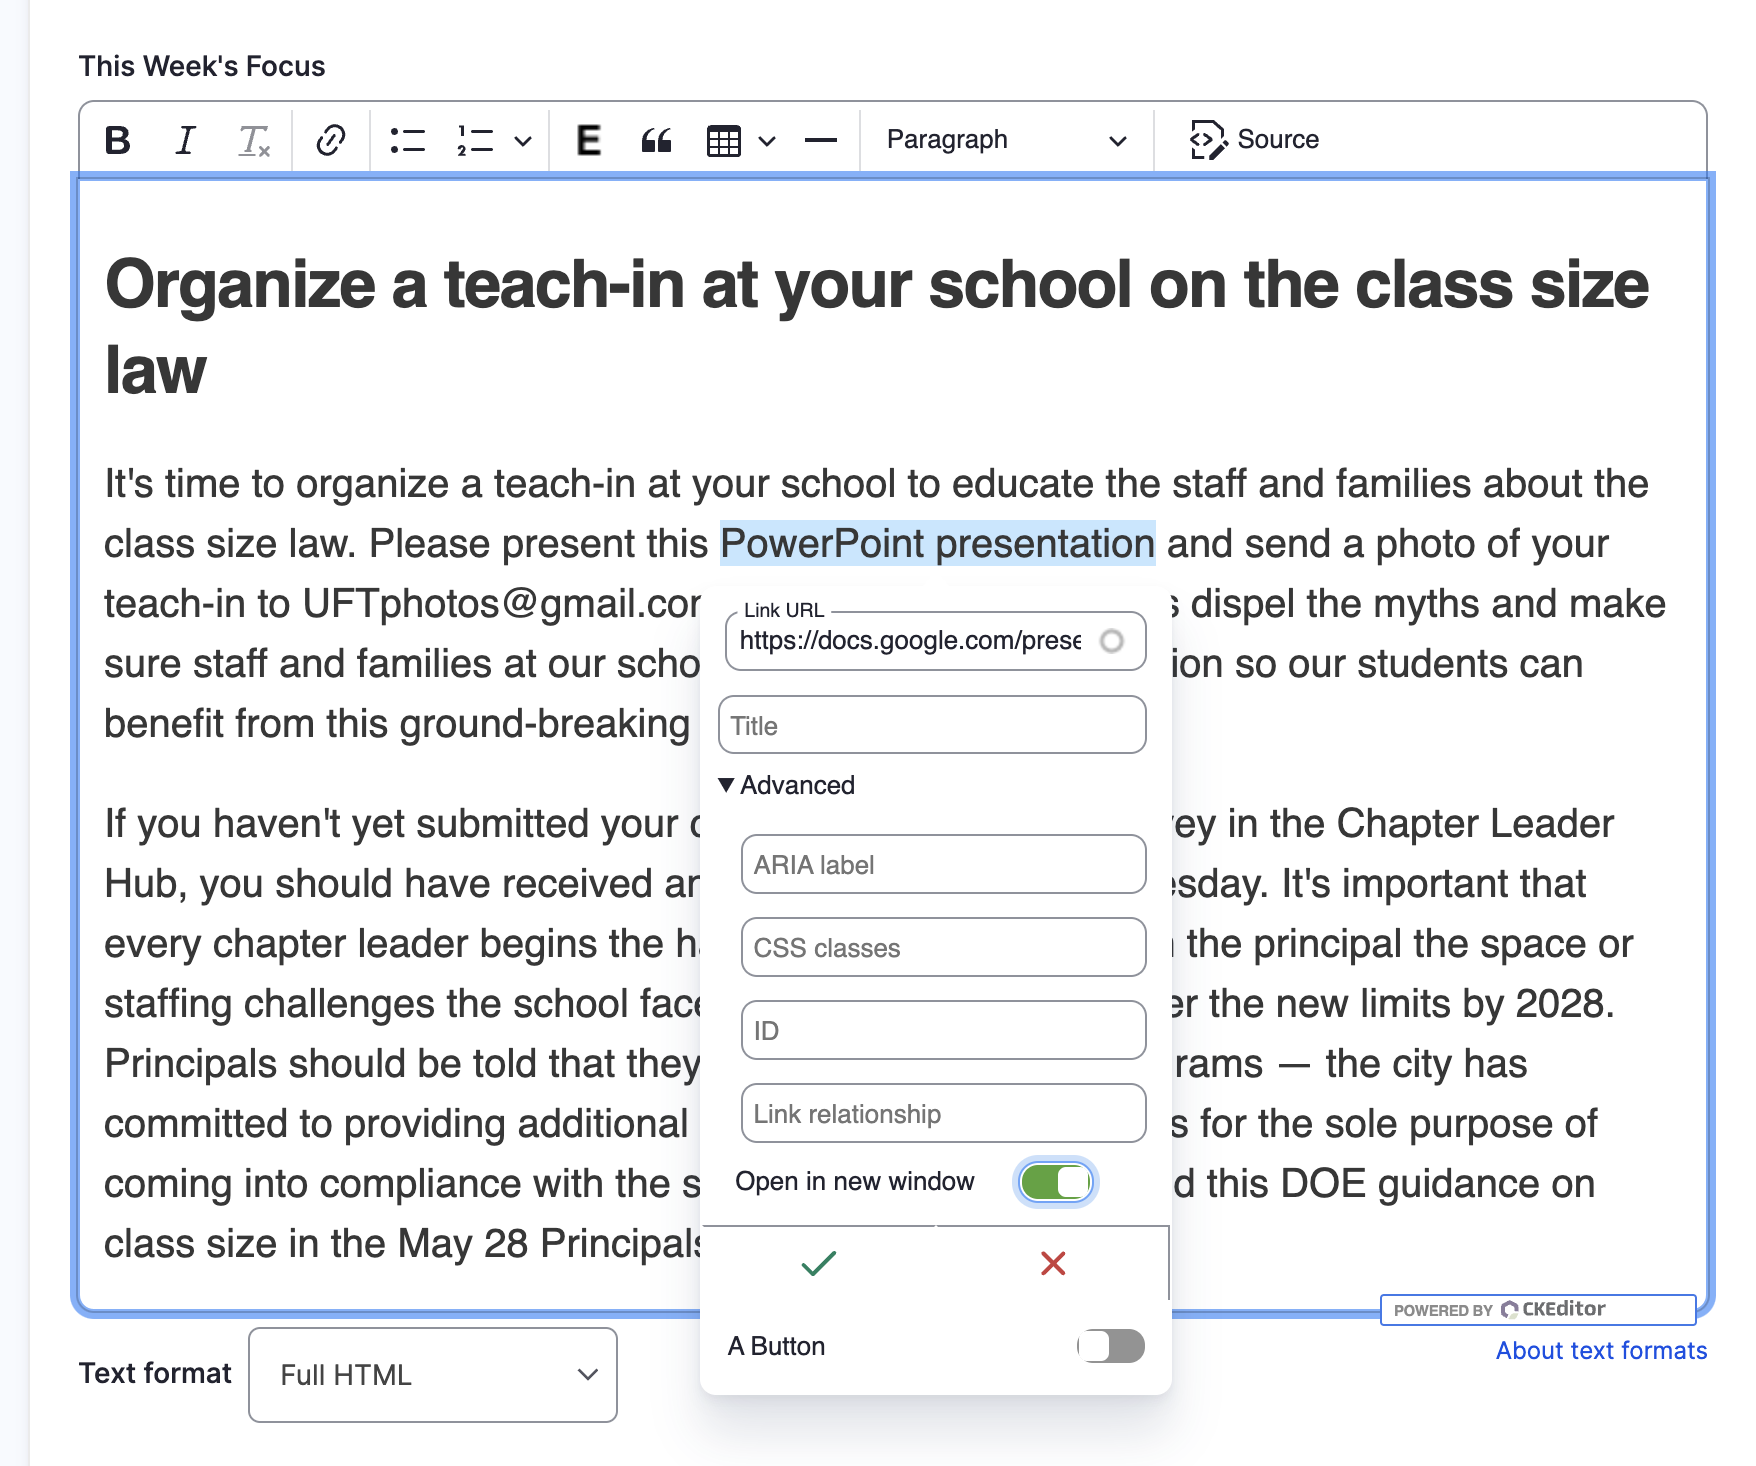
Add links to the text as you normally would when creating any web page within the site. They should match the links in the email.
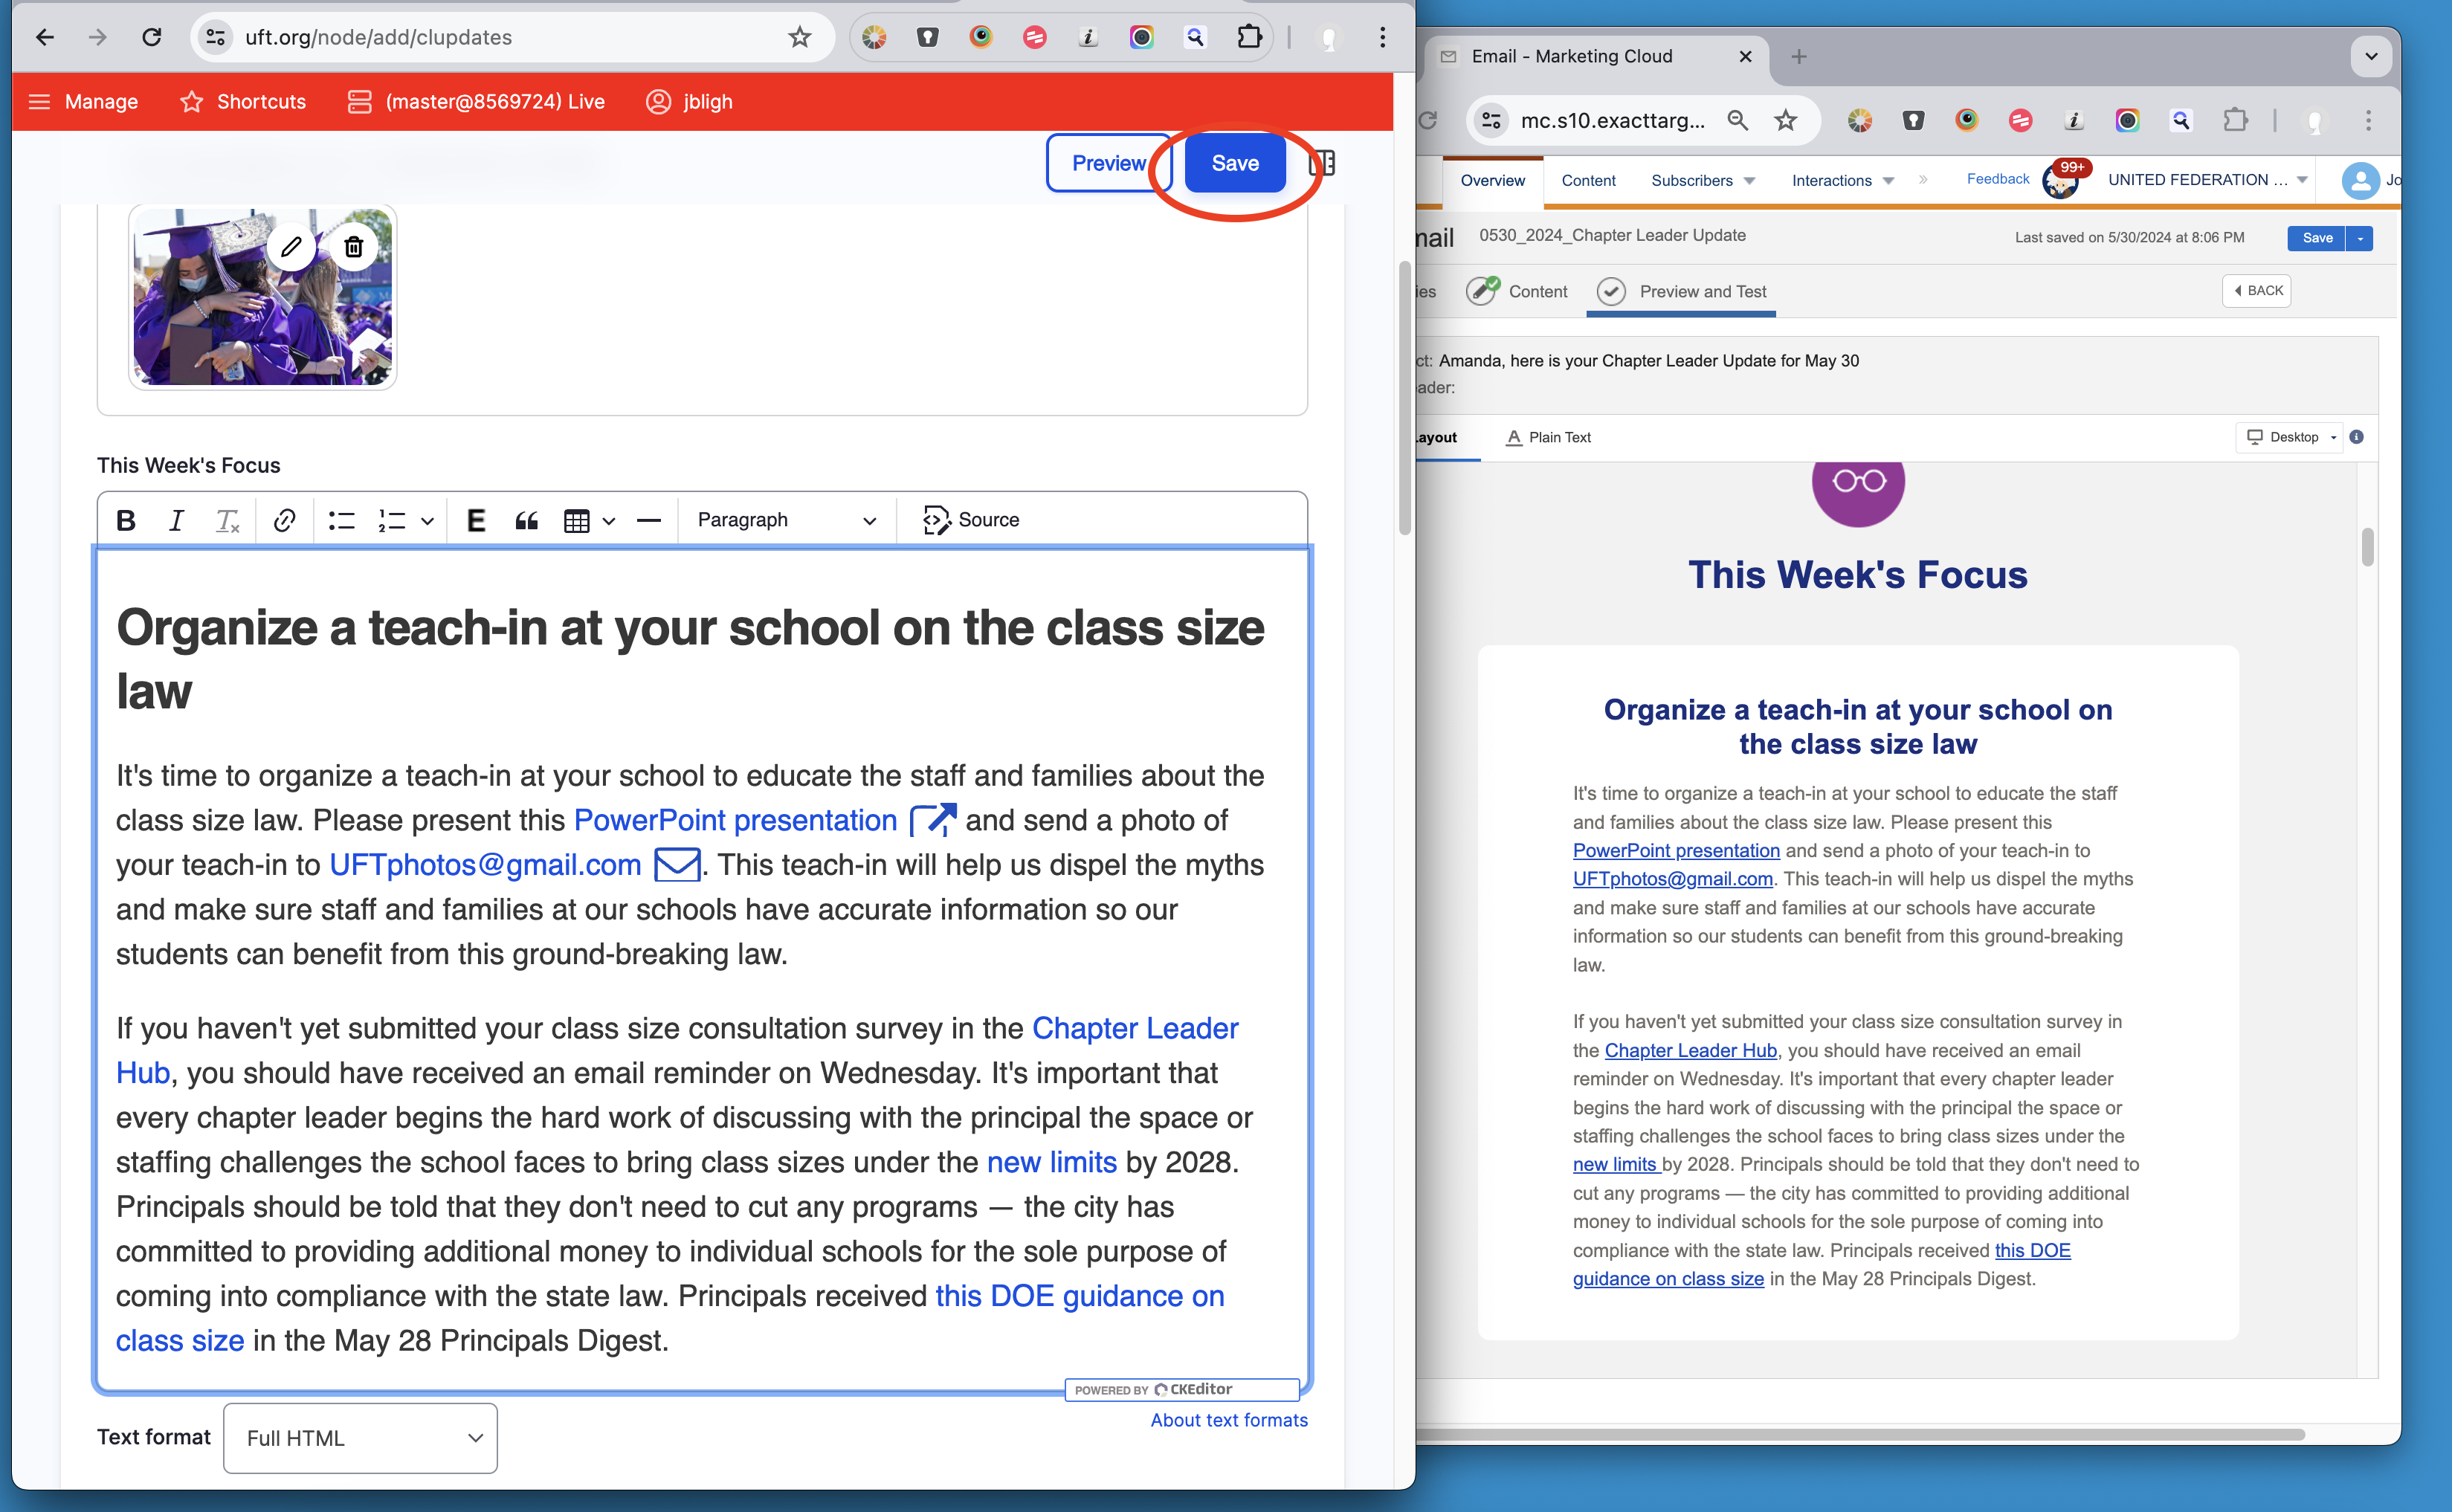
Remember to save frequently by clicking the “Save” button.
The “You Should Know” section
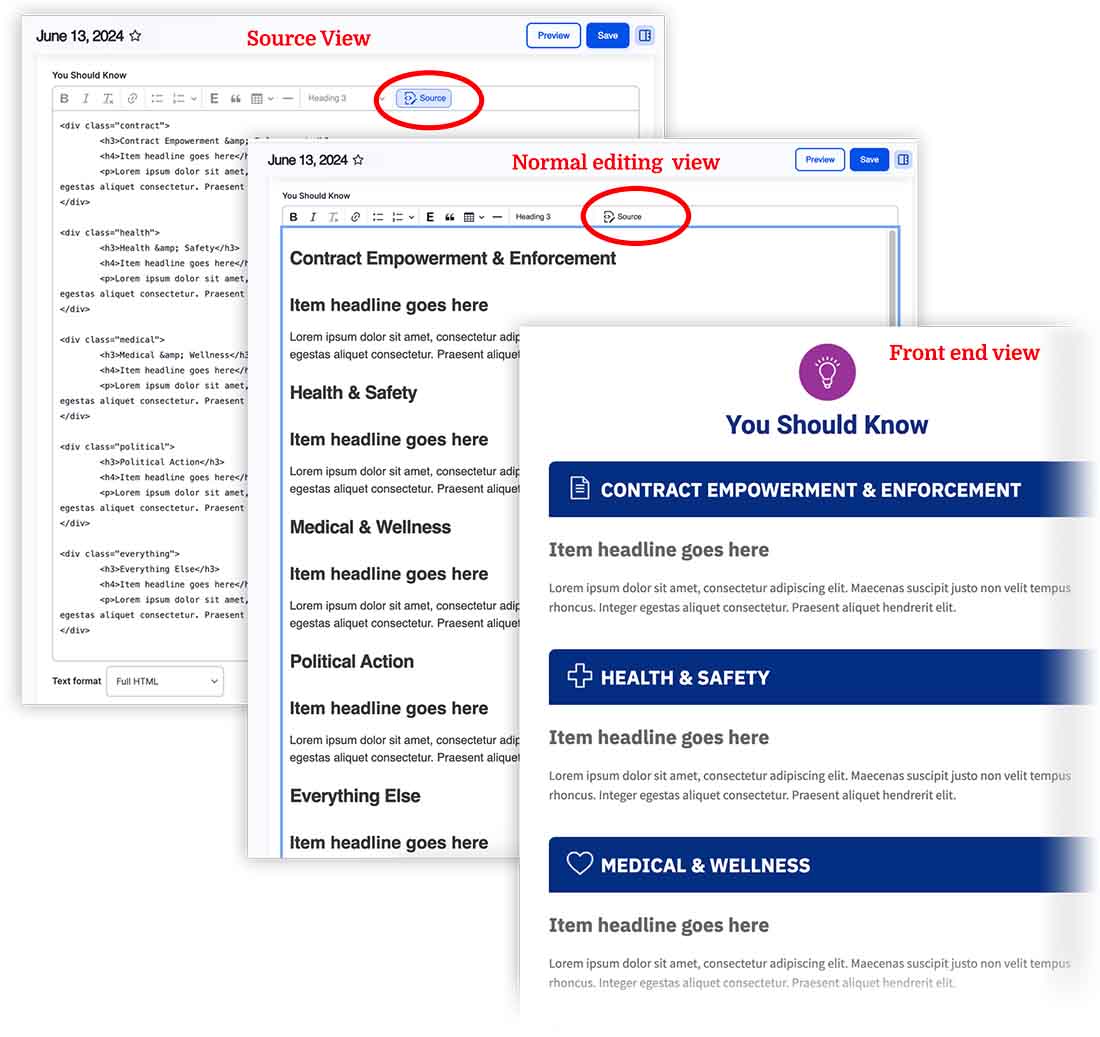
The only section that needs special coding is “You Should Know“. Each sub-section here requires that it be contained within a <div> tag with it’s own unique class. This styles the header for each one so it will mimic the CLU email.
The correct format for each sub-section should be as follows:
<div class="[Section]">
  <h3>[Section Title]</h3>
  <h4>[News Item headline]</h4>
  <p>[Item content]</p>
</div>
Each div must surround the content within it and must have one of the following classes:
| Section name | Class name |
|---|---|
| Contract Empowerment & Enforcement | contract |
| Health & Safety | health |
| Medical & Wellness | medical |
| Political Action | political |
| Special Education | special |
| UFT Elections | elections |
| Everything Else | everything |
Alternately, you may simply use the code below, paste it into the “You Should Know” section while in “Source” view and add your content to the correct areas by pasting it from the source.
Final notes and comments
Thought we’ve covered all the major points of creating the CLU of the web, there are some final, important things to do and be aware of before publishing it live:
- As soon as you publish it, the Chapter Leader Update you just created immediately becomes the top-level CLU so please make sure all everything is correct before doing so.
- You must set the listing image separately on main CLU View page. Even though it’s set for that unique Chapter Leader Update, it will not carry through to the main page which uses it’s own listing image. To do so, just go to the main CLU page and change the listing image to the one you want to feature. This is especially important for social media and sharing.
- If there are any further edits, you must go to the Chapter Leader Update archive page and edit it there. Sometimes, due to caching issues, edits you make on the content do not show up on the main view page. In that case, you must re-save the main CLU view page to get your changes to show.