Standard Emails
These instructions are based on the creation of the Chapter Leader Update, but can be used as a general guideline for any standard email send.
This is part 2 of 3 in a series: Also see tutorials on Creating the Chapter Leader Update and Create the Chapter Leader Update for the web.
1) Prepare a Send Definition

- In Marketing Cloud, find your Email and copy it’s title
- In Marketing Cloud, Go to “Email Studio” and select “Interactions > Salesforce send emails“

- Find correct folder (Year > Month) and click “Create” once and only once.
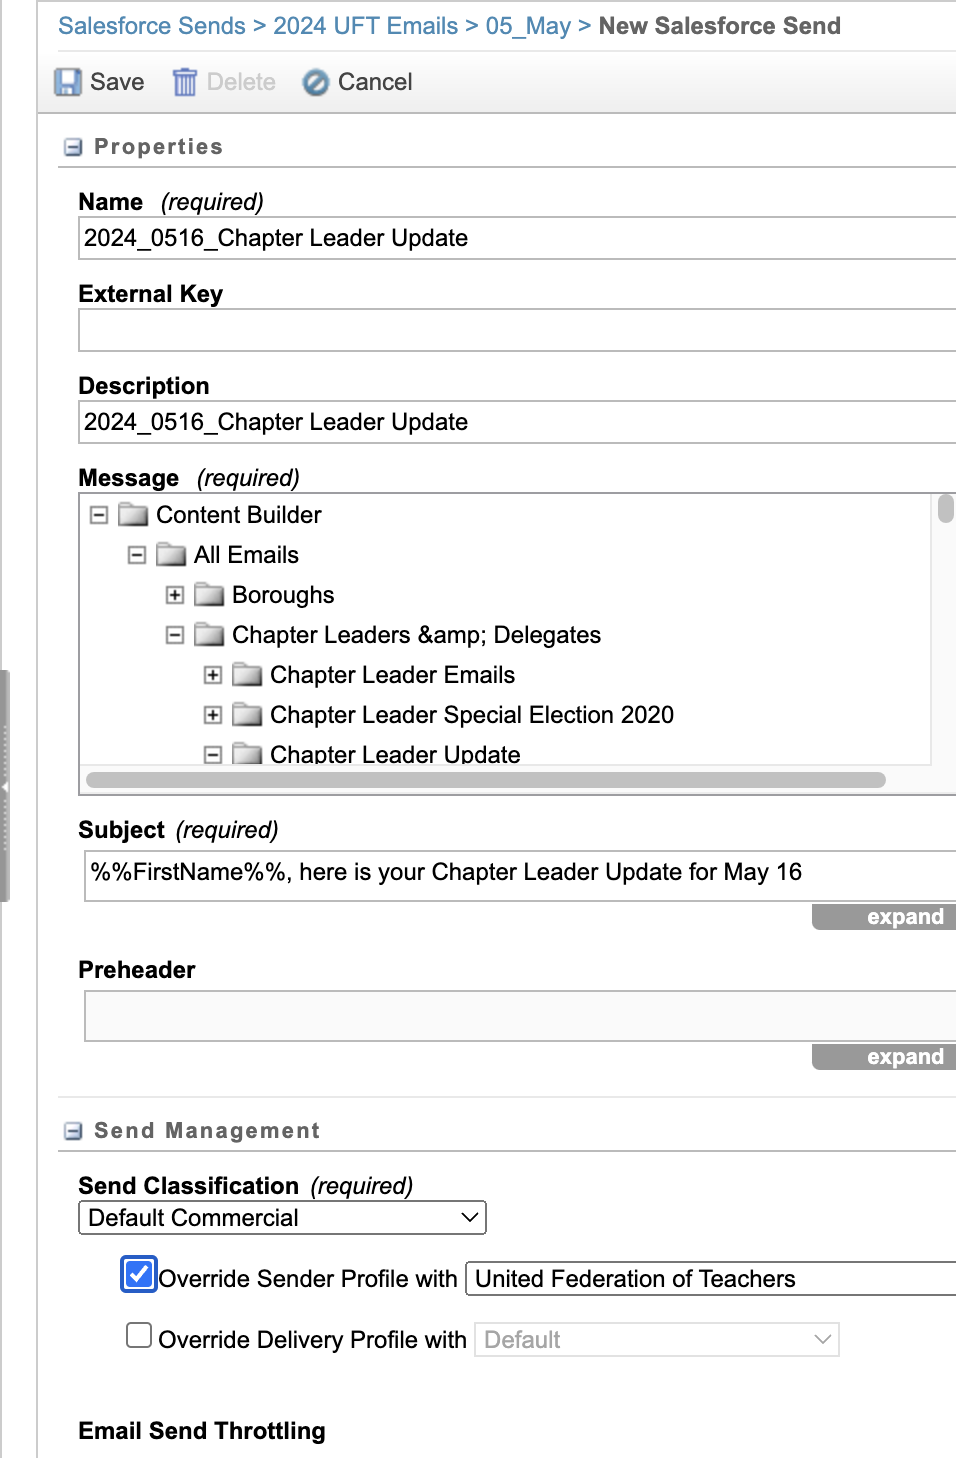
- Paste the email name into Name and Description.
- In the same window, go to the Message frame, click the Content Builder folder, find your email and select it. This should automatically fill in the Subject field.
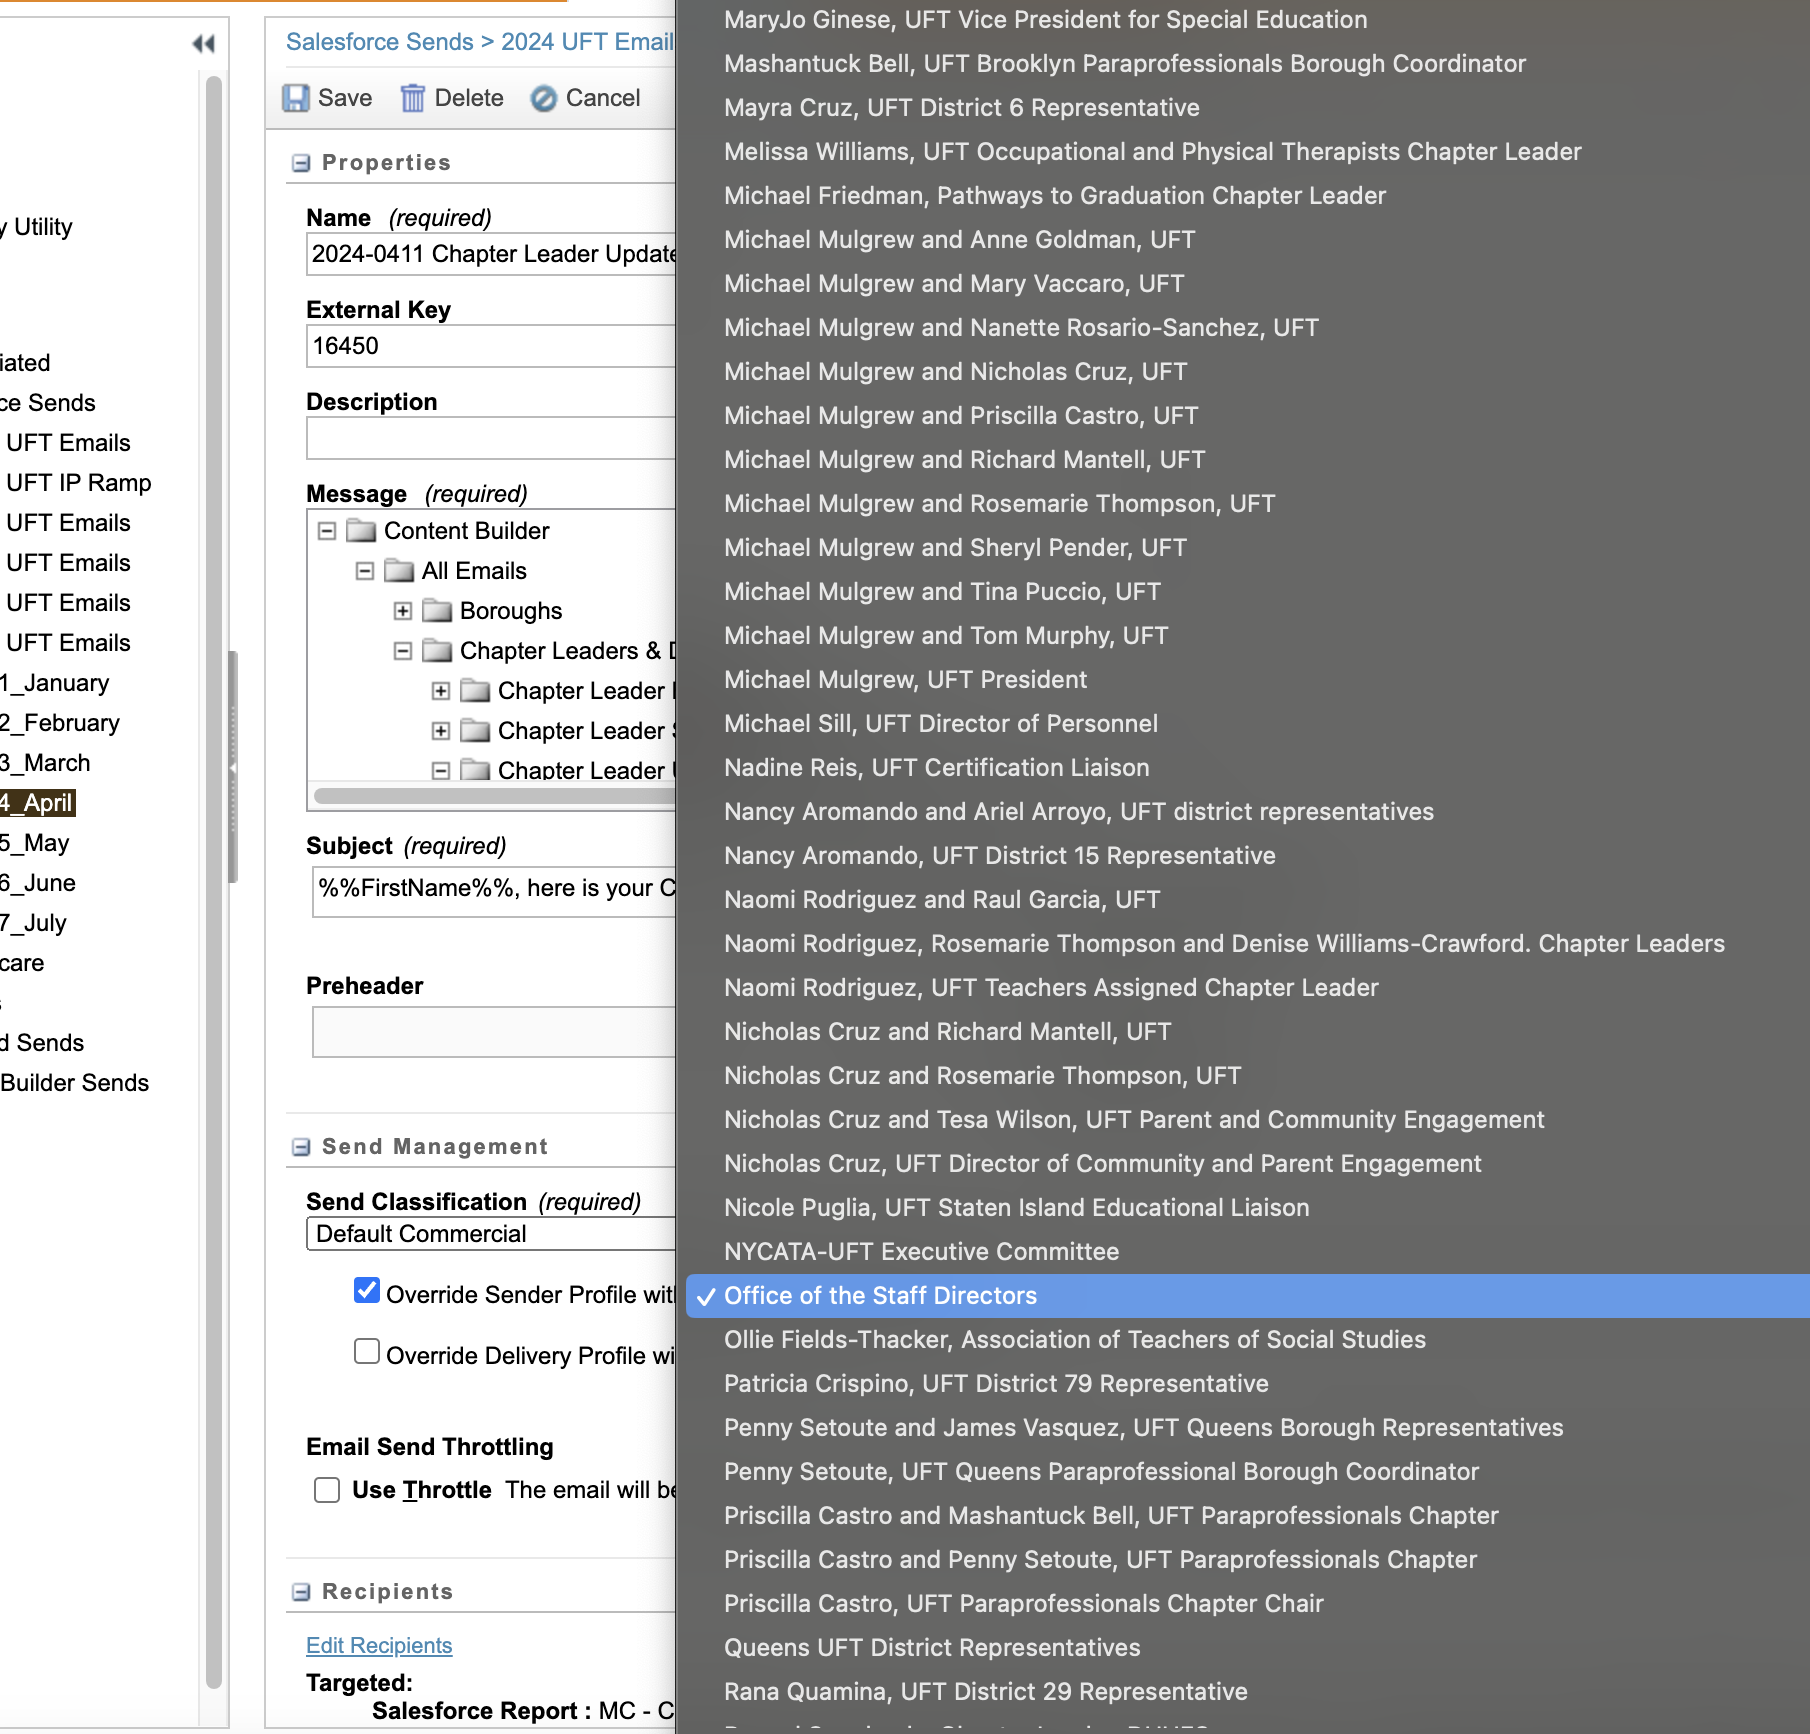
- Under Send Classification (required) check the “Override Sender Profile with” checkbox and click on the sender list to the right of that. In the resulting long drop-down list, select the correct sender.
In the case of the Chapter Leader Update, the sender is always the Office of the Staff Directors.
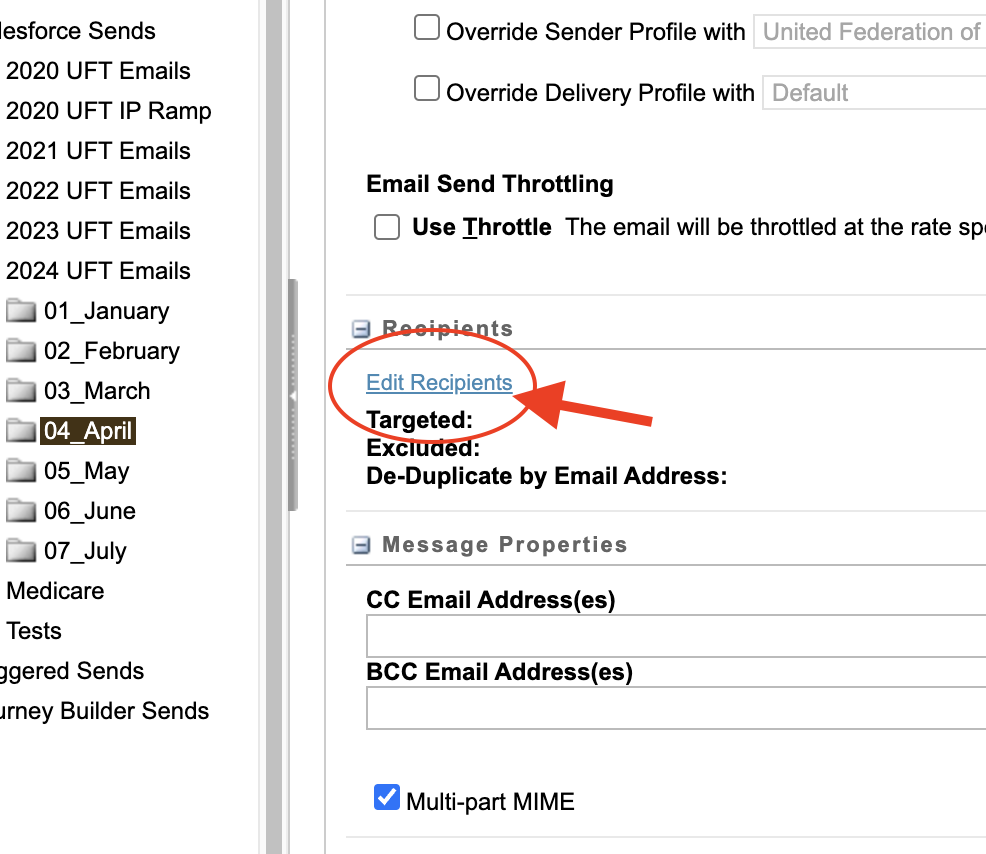
- Scroll down to the “Recipients” section and click “Edit Recipients“.

- In resulting window, select “Salesforce reports” (a “report” is essentially a mailing list) and click the double right arrow button. This will open the “Add Reports” window.
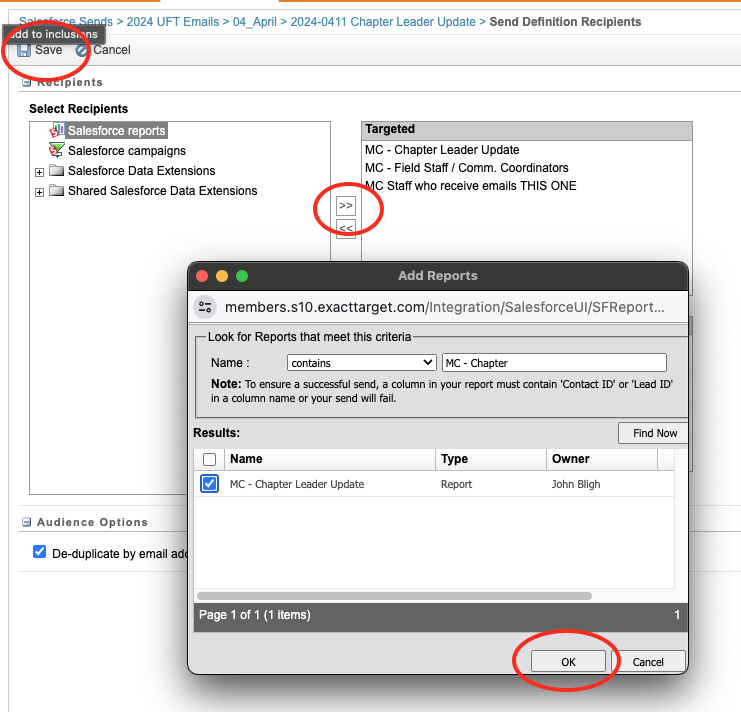
- In the “Add Reports” window, search for recipients (The search criteria is keyword-based. A recipients list usually starts with “MC”). After each selection, click OK. Repeat until you’ve added all the reports required. You must add the reports one at a time!
For the Chapter Leader update, add the following reports :
- MC – Chapter Leader Update
- MC – Field Staff / Comm. Coordinators
- MC Staff who receive emails THIS ONE
Once you’ve added the correct reports, click “Save“. You’ve now created a “Send definition“
2) Create the Send

- Go to “Email > Journey Builder > Automation Studio > [Current Year] Emails > Month“

- Select “New Automation“
- Select and drag “Schedule” to Starting Source Column

- Select and drag “Salesforce Email Send” to Step 1 Column.
*It should be noted that there is a bug where sometimes, “Salesforce email send” will not be labeled. If it’s not, refresh or select by process of elimination. - In the “Salesforce Email Send” box, click “Choose“.

- In the resulting modal window, select the Send Definition you just created and click “Done“.
- Click “Save“. This will generate the “Save Automation” modal window.

- In the “Save Automation” modal window, name your automation with same name as your Send Definition.
- Click “Save”.
3) Add contact emails

- Select the “Activity” tab
- Add your UFT email to “Runtime Error” field.
- Add “digicommteam@uft.org” to the “Run Completion” field.
- Click “Save“
4) Schedule the send

- Select the “Workflow” Tab
- Under “Schedule”, click “Edit” or “Configure” (the button can say either depending on whether you’ve saved it or not) and enter when you want your email to send and click “Save”.
- By default, your send will be paused until you click “Active” to make it live. You can pause it again at any time before it sends.
Data Extensions (Only used for events)
Step 1
- In Salesforce select the “Campaigns” tab
- Find your event and select it.
- In the URL, copy the Campaign ID.
- Make sure there are contacts in the campaign – Contacts in Campaign, Total #…, and “Campaign Members” should be the same
Step 2
- Go to “Marketing cloud > Email Studio > Subscribers > Synchronized Data Extensions“
- Select “Campaign Member Salesforce” and select the filter icon in the top right
- Drag “Campaign ID” into “Create Filter” window
- Paste the Campaign ID you copied from the URL
- select “Save and Build“
- Select “Cvent Events” and find your folder and select it.
- Click “Save“
Step 3
- Select the Properties tab
- Select “External Key section > Use for Sending window“
- select Edit
- Select “Use for Sending” > “Lead or Contact ID” in the first dropdown.
If the record amount doesn’t populate, double check your campaign ID.